Browsing Category

Paper Flowers

Cardmaking Joset Designs Paper Flowers Paper flowers

You’re So Cute

April 22, 2022

Karen here today. I’m sharing a couple cards I made with the same sketch but different products from Elizabeth Craft Designs. Today I used the adorably cute Elephant and the Florals 12 to make two very different cards!

How cute is that Elephant! And so easy to put together. I used grayish brown and beige cardstock to cut the pieces and colored his eyes with a Copic C7. I also added a little blush for the cheeks with distress ink in Kitsch Flamingo. To create the card front, I just cut a piece of 90 lb White Soft Finish Cardstock at 4-1/4×5-1/2″ and taped a triangle of the patterned blue paper to it, and I then cut that with a stitched rectangle die. The sentiment is from the Furrever Friends set.

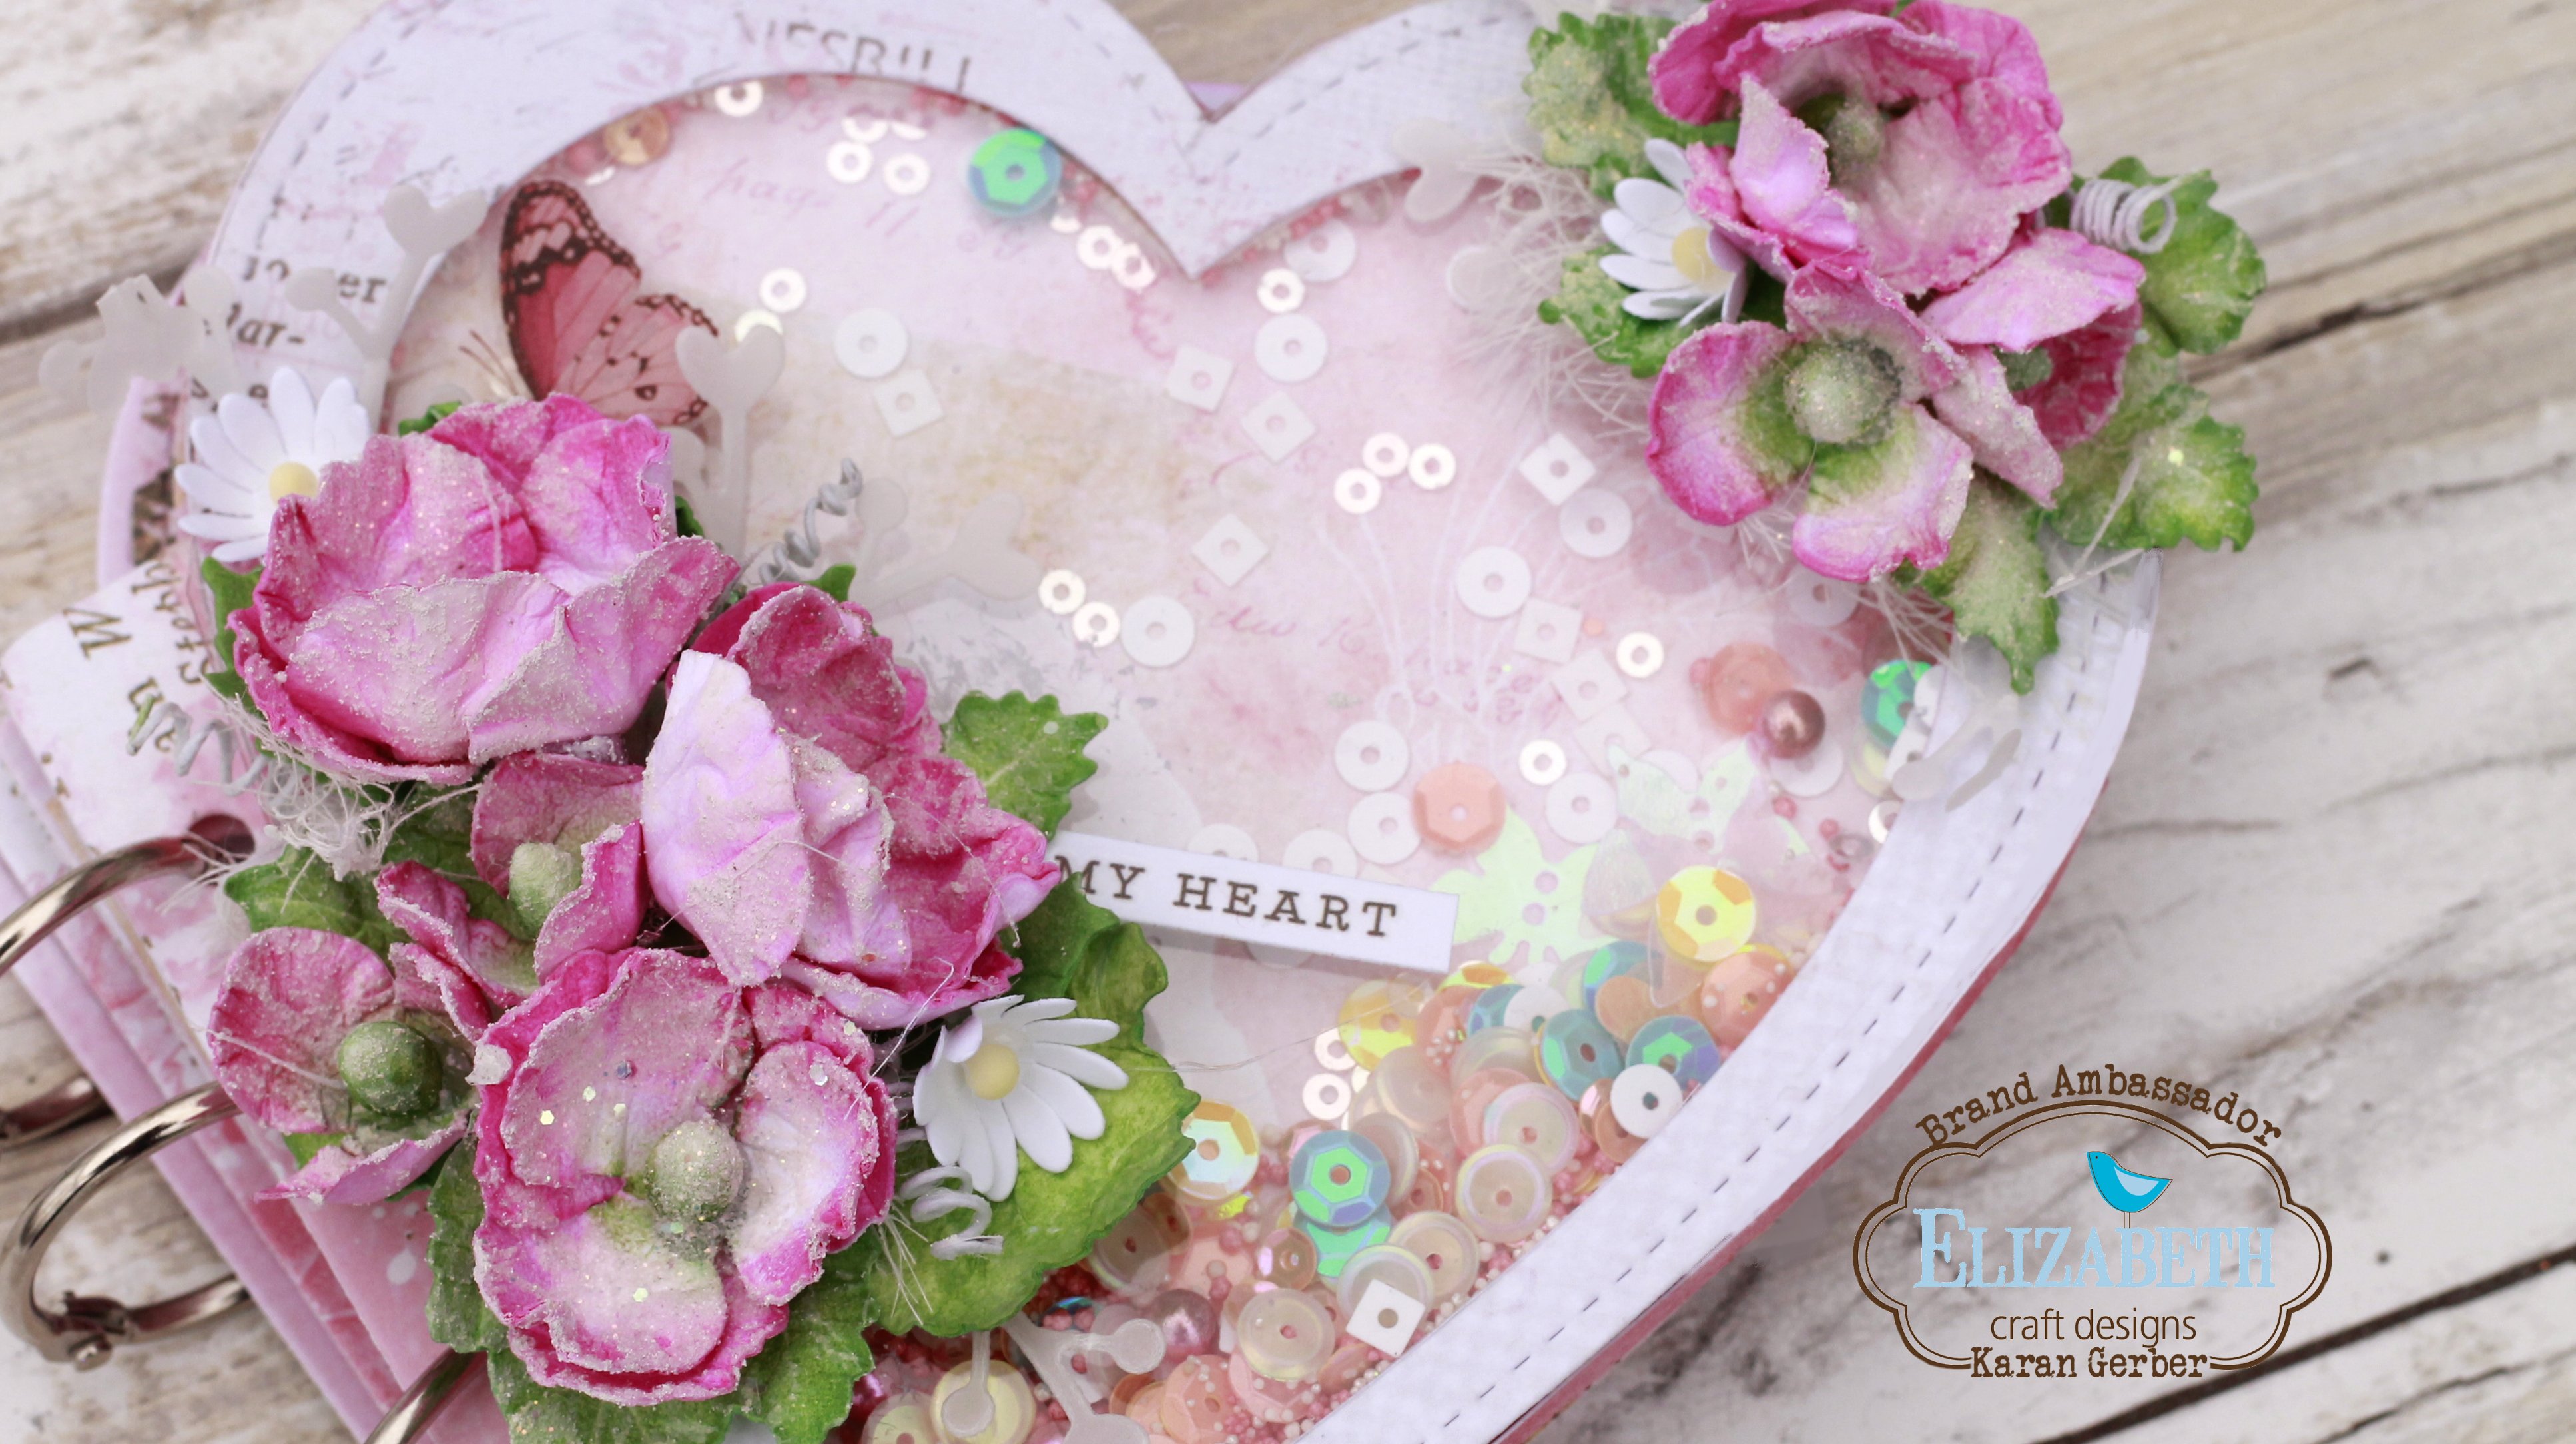
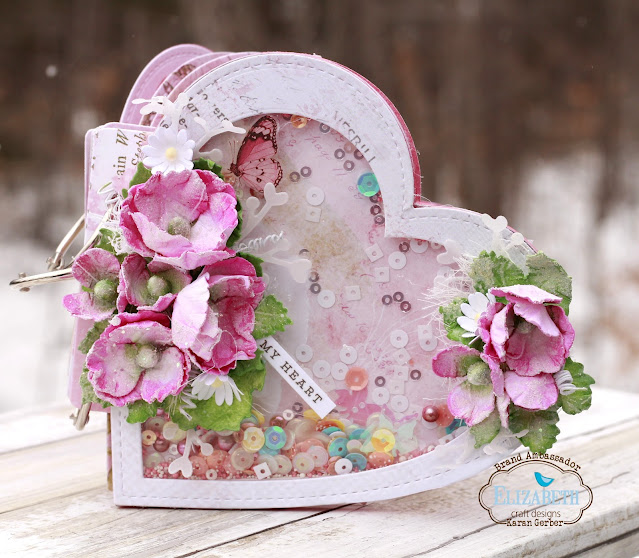
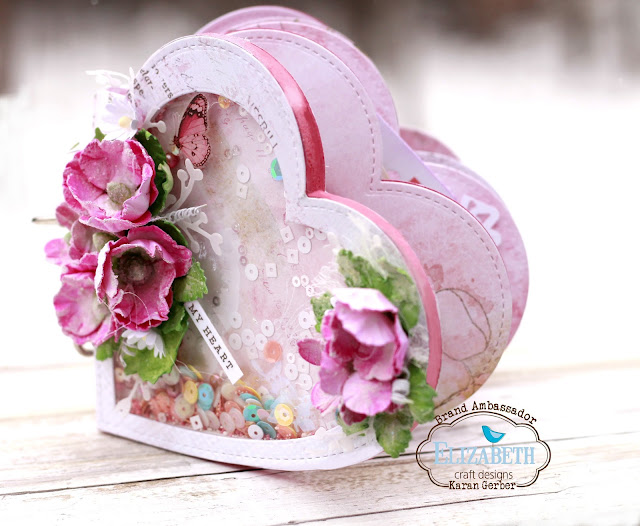
Love these beautiful flowers from the Florals 12 set. They were cut with the 90 lb Soft Finish Cardstock and then colored with DIstress Oxides in Salty Ocean and Scattered Straw. I colored, then dampened with water, and then shaped them.

Yes, it’s never too soon to start making Christmas Cards! I used the Cute Winter Sentiments on this one!

Thanks for stopping by today!

Craftily yours, Karen

Supplies from Elizabeth Craft Designs

Other Supplies

Patterned cardstock and inks

Beautiful Blooms Paper flowers Paper Flowers

Enjoy the Little Things

April 20, 2022

Hello and welcome back! It is Karan Gerber here today sharing a project with you designed using some of the new Florals Volume 4 Dies to create this stunning Floral Bucket Frame. 

I began by cutting out the frame die four times to create the frame. For this projectI did not cut it down and the overall measurement of this project is 8.5″ x 8.5″ with the inside frame pattern paper measurement being 7.5″ x 7.5″.

I colored the Florals with Kitsch Flamingo and a mix of antique linen

I colored the leaves with Peeled paint Distress Ink. I then turned the florals and leaves over lightly misted with water and began shaping. I used stamens from Dress My Crafts to add the detail in the center of these florals. I cut the bucket out from one of the coordinating papers from the collection pack.

It is a beautiful floral framed project and I love how it turned out. 

Elizabeth Craft Designs Supplies:

Cardmaking Fantasy Flowers Paper Flowers

Elegant flower card

April 15, 2022

Hi everyone, it’s Marla back with another ECD card share. It’s so nice to finally be able celebrate wedding season properly. If you are like me and have several weddings to attend, the recently released “Florals 4” dies are just what you need to create spectacular wedding cards. The card I am sharing today will not only wow a bride and groom but can be used for many other celebrations. Let’s begin…

Step 1. Cut out your flowers and pistols using the “Florals 14” dies and white cardstock. Use a sponge dauber to apply color to your flowers on both the front and back side. I used “Dried Marigold” Distress Oxide and then added “Worn Lipstick”, making sure to leave white space toward the tips of the petals. Add depth with a coordinating-colored pencil to define the embossed line down the center of each petal and add shading toward the center. Then color your pistols, I used Distress Oxide in “Squeezed Lemonade.”

Step 2. Use a stylus to shape each flower layer. I spritzed the backsides of mine with water and gently depressed the end of each petal to help curl them under. Once the layers are shaped glue your flower layer as desired, making sure to offset the petals.

Step 4 Cut out the leaves using “Leaves and Branches” from vellum and white cardstock. Color the backs of a few of your vellum leaves. I used “Bundled Sage Distress Oxide” ink. Using wet glue, add ECD “Diamond Silk Microfine Glitter” to the leaves cut from white cardstock.

Step 5 Stamp and trim down a sentiment. I used a sentiment from the “For You” stamp set.  

Step 6. Cut an ivory piece of cardstock to 8.5″ by 3.5″ and emboss with a slimline embossing folder. Use two slimline dies to create a frame and layer it on top of the embossed panel. Attach to an 8.75″ x 3.75″ side folding card base.

Step 7. Arrange and glue your flowers and leaves to your card panel.

That completes my card for today. Thank you so much for joining me today. Until next time…Marla

Elizabeth Craft Designs Supplies:

Elizabeth Craft Designs General Paper Flowers Planner Essentials Scrapbooking

New Bucket (of Strawberries) Summer Planner Spread

April 11, 2022
Hello again everyone, it’s Annette Green here today with some more Summer planner pages featuring the new Flower Pot/Bucket die set from Joset. I combined Planner Essentials dies with the flower pot and Strawberries die to showcase some cute photos of my dog Suki eating strawberries, as well as a visit from my parents last year. I’ve created a “Craft With Me” style video if you’d like to follow along as I design and assemble these pages.
As I describe in the video, to make more room for journaling and large sized photos, I added a half-page in the middle of my two full-size pages using the Planner Essentials 14 Bookmark 1 set. This is an interesting way to layer and still see some of the elements from the other pages peeking through.
The star of the show, besides Suki, is the rusty bucket full of strawberries. With a few alcohol inks and some silver metallic cardstock, you can get the same look quickly and easily. It makes a fun embellishment to the page to help tie everything together. I hope you take a moment to watch the video, as I share some techniques I used and helpful design tips along the way. All products I’ve used today are linked below, in addition to some of the other new dies I showed in the video which I used on other projects. Thanks for stopping by today. Have a wonderful week!
Cardmaking Paper flowers Paper Flowers

Thinking Of You – New Florals with Karan

April 6, 2022

Good morning friends and welcome back! It’s Karan Gerber here today to share a card with you designed using Florals 16 and the new Shadow Frame die.

Being the frame die is large for a card, I cut it down on the straight end of the frame and kept the angled end, the way it was, I cut a piece of pattern paper to use as the background and adhered the frame on top. 

I colored the florals using Distress Inks – Picked Raspberry, Kitsch Flamingo, and a bit of Antique Linen. 

Using my shaping tool, as well as the groove tool and my fingers, I shaped these to resemble Hibiscus. When we are in Florida, the Hibiscus are always in full bloom and they look so beautiful, so my idea came from that. 

Thank you for dropping by today and I hope I have inspired you to give the new Florals Volume 4 a try.

Karan

Elizabeth Craft Designs Supplies:

Cardmaking Paper Flowers Scrapbooking

Birdhouse Florals

March 16, 2022

Hi friends, welcome back. It is Karan Gerber here. Today I am sharing a card using florals 5 and the Birdhouse die from Joset. 

I created Daisies from Florals 5 using a groove tool to add dimension to the petals. I colored using Sunflower Archival ink and used prills in the center (they are called Rippit).

The birdhouse is perfect for a card, and with snow still on the ground in my area I felt adding a bit of snow paste to the top of the house fit perfectly. To add some detail to the background I set the birdhouse on a die cut using the Stitched Circles. I love adding layers using the stitched dies.

I thought the Floral Burst background set off the daisies and love how that gold mirri mimic my handmade daisies. Thank you for dropping by and until next time, Happy Scrapping!

Elizabeth Craft Designs Supplies:

Paper Flowers

Roses Are Red, Violets are Blue…..

March 4, 2022

Hi Everyone, It’s Els here and my turn to give you some inspiration. This time I made a card you can use for many occasion, like Birthday, Thank you, Mother’s day etc…… Below you find the step for step instructions. Have fun creating this card!

  • Take the middle and the small flower die from the Florals 4 and cut them both 9 times , use the small leaf from the Florals 13 set and cut 10, also cut 10 small flowers from the Florals 10 set use the Soft Finish Cardstock.
  • Take the smallest flower from florals 4 and cut of 1 petal
  • Color the flowers as shown on the photo you can also give them other colors, I used a fineliner to make the black lines.
  • Spray the flowers on the front with water, not too wet and shape them then turn them over and press in the center.
  • Glue the small one on top of the big flower
  • Varnish the flowers with 3D Lacqer when dry put a yellow nuvodrop in the center.
  • Shape the leaves and the tiny flower and put stamens in the flower
  • Make a nice arrangement on any die you have
  • Glue the whole arrangement on a 6 x 6 card in the color that fits with you flowers.
  • As you can see on the first picture, I also made a broche. I used 1 pansy, 2 leaves and 2 tiny flowers from my leftovers. For extra green I cut 1x the fern die and cut it apart.
  • I used the 3D Lacquer on the whole broche.
  • I hope I gave you some inspiration to make a card like this and also for the broche you can do that with every flower you have.

Till next time!

Els

Elizabeth Craft Designs Supplies:

Other supplies:

3D Laquer-Stamens-Nuvo drops-Black fine liner-die-Cardstock-Gold cardstock-Inks

Fantasy Flowers Paper Flowers Sidekick Essentials

Gift Box with Handmade Roses

March 3, 2022

Hello friends and welcome! It is Karan Gerber here to share a gift box i created and i have adorned the cover with Handmade Roses using Florals 8.

Cutting out 8 sets of florals 8 and plenty of leaves, i set about coloring these with Tea Roe Archival Ink and Magenta Hue Archival Ink. 

the inside of the box, i created a card, using the cutout from the top of the box which is Sidekick Essentials 5. I matted the cut out in gold mirror paper long with the sentiment from the paper collection i used.

The top of the box, i covered with Acetate and used the Floral Burst Background to do a die cut in Gold Mirri and I love how this turned out, it looks so elegant.  

I hope you enjoyed my project today and until next time

Happy Scrapping!


Cardmaking Fantasy Flowers Paper Flowers

Happy Birthday Card

February 16, 2022

 Hello Friends and welcome back. It is Karan Gerber hosting the blog today and I am sharing a card using Florals 12 to create some beautiful Lilies. Lilies remind me of spring and with the thought of warmer weather soon to come, i wanted to create some cheery florals. 


I cut 6 large, 6 medium and four small from florals 12 and colored them with Fossilized Amber Distress Ink. I cut the leaves from Florals 1, and colored them with Bundled Sage. 


I also cut out three hearts from the Stitched Hearts and lightly inked the edges. I cut two sets of the Blooming Branches and cut them apart tucking them in around my florals to add more dimension.

The smaller florals i also colored with Bundled Sage, layering them together and using yellow stamens in the centers. 


Using Stamens from Dress My Craft i used them in the center, using my hot glue gun to secure them. To get that beautiful frosted look i used Diamond Dust along with Rock Candy Crackle, which dreis clear and allows the frost to shine through.

I hope you like my card and my take on lilies using Florals 12, i hope you give these florals a try. 
Looking forward to seeing you again, until next time, Happy Scrapping!


Fantasy Flowers Paper Flowers Planner Essentials Sidekick Essentials

You Have my Heart

February 3, 2022

Hello Friends, welcome back, it is Karan Gerber on the blog today to share my first project for February. With Valentines coming soon, I had an idea to create a mini album from the Heart Shaped Dies.

I used Florals 4 on the Cover, coloring them with Picked Raspberry and Mowed Lawn Distress Inks. Here are some details of the mini album I created.

I created a shaker box on the front cover using acetate under that fist paper layer and then adding two layers of foam tape. The side of it actually looks like one of those heart shaped candy boxes you see. 

Inside front cover and first page. Here I used Planner Filmstrip (1656) and die cut the smaller frames from that set and die cut a heart. The sentiments are from the paper pack. 
To get the pages to work in an album, I die cut the page connector from Sidekick Essentials 16 and attached it to the back of each of the pages. 

For page 2 and 3 I used Planner Essentials 3 and cut down the photo frame to suit the size of the page. The tag is from Planner Essentials 4 which I basically used as an insert here.

Page 3 and reverse of the tag. Here I used Planner Essentials 2 adding some rubons to the slide in die for the tags.

For page 4 and 5 I used the Planner Film Strip.

Page 6 and 7 which are the last pages of this cute little mini album. I used some heart die cuts, the filmstrip as well as the die cut “You” from Sidekick Essentials 2.

It was a fun little project to do, and I hope you give these heart dies a try to create your own little mini album. 

Happy Valentines & Happy Scrapping!

Until Next time!

Karan

Elizabeth Craft Designs Supplies Used: 

%d bloggers like this: