

 Hey Friends! It’s EK Gorman, and I popping in today to share with you a new card tutorial. Have you ever found that your die is too big for the size card you want to create? I just adore Suzanne’s Cannon’s A Way With Words Wreath & Elements die, but it really is meant to adhere to a project larger than 6×6 inches. However, my favorite card size to work with is A2 (4.25×5.5 inches), so the die just doesn’t fit. But today I am sharing a cool and easily solution to make the over sized die look like it was meant to be.
 Step One: Die cut the Way With Words Wreath & Elements die set out of 90lb Soft Finish Cardstock. You do not need to die cut the full die.
 Step Two: Die cut the floral piece that is meant to be layered under the Wreath flowers. Color the piece with ink. I used Abandoned Coral. Adhere with Kids Choice Glue under the die cut wreath.
 Step Three: Trim a piece of Watercolor Paper to 4.25×5.5 inches. Spray the watercolor paper with liquid watercolor in two coordinating colors. I used both an orange and yellow spray ink from Tattered Angel. Let dry or set with a heat gun. Splash the inked cardstock with the lighter ink to create more visual interest.
 Step Four: Die cut the sprayed ink paper with the Stitched Rounded Rectangle die set.
 Step Five: Using 10mm Clear Double Sided Adhesive, adhere the watercolor paper to an A2 card frame. Using Kids Choice Glue, adhere the wreath, letting it hand off the edge. Trim off the excess.
 Step Six: Die cut from 90lb Soft Finish Cardstock the piece of the You Are Perfect die set. Leave the ‘you are’ white, but color the ‘perfect’ with an ombre effect. I used both Canddied Apple and Abandon Coral Distress Oxide to create this effect.
 Step Seven: Adhere the sentiment to the cardstock using Kids Choice Glue. Let it over lap the wreath.
 I just love how you can get a whole new look using just a section of this beautiful die. Do you ever trim your dies so they can fit smaller projects? Let us know in the comments below. Until then, Happy Crafting!
Elizabeth Craft Designs Supplies:


 Step One: Trim a piece of 90lb Soft Finish Cardstock to 4.25×5.5 inches. Using black alcohol ink ink stamp an image from the Floral Girls Stamp set.
 Step Two: Using the same ink, stamp floral images from the A Field of Flowers stamp set around the image of the girl.
 Step Three: Stamp the sentiment onto the cardstock using the same stamp set and ink.
 Step Four: Using alcohol ink color in the image. I used copics.
 Step Five: Using the new Make Your Mark stencil, add stenciling to the cardstock using Distress Oxide. I used Shabby Shutters.
 Step Six: Using 10mm Clear Double Sided Adhesive, adhere the trimmed stamped and colored cardstock to an A2 card frame.


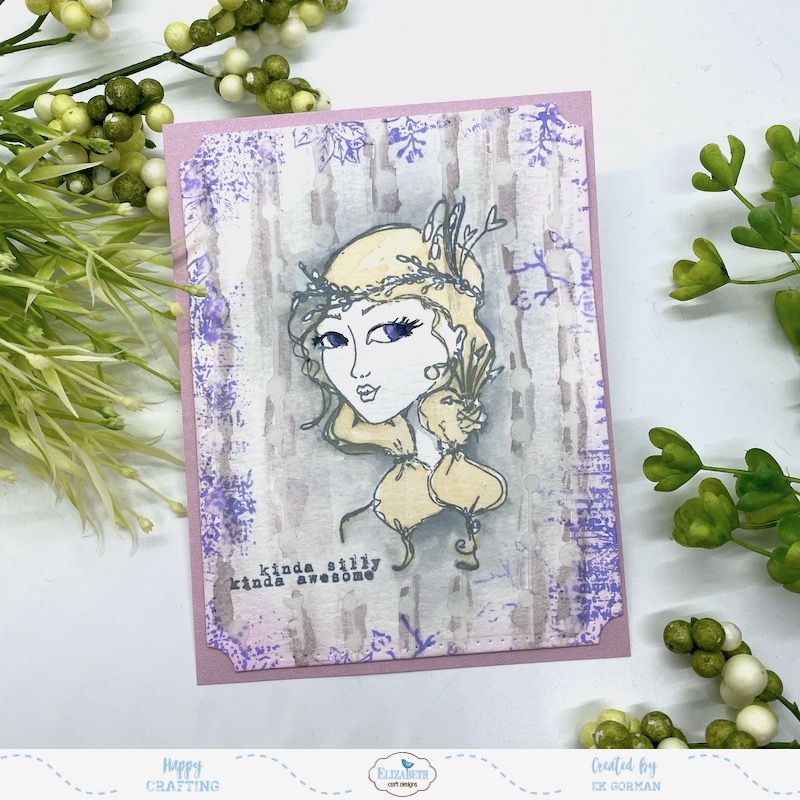 Hey Friends! It’s EK and today I thought it might be fun to try to create a modern take on a vintage look. Designer Ilse and Charlene’s new stamps and stencils make creating this look so simple with their old school flare.
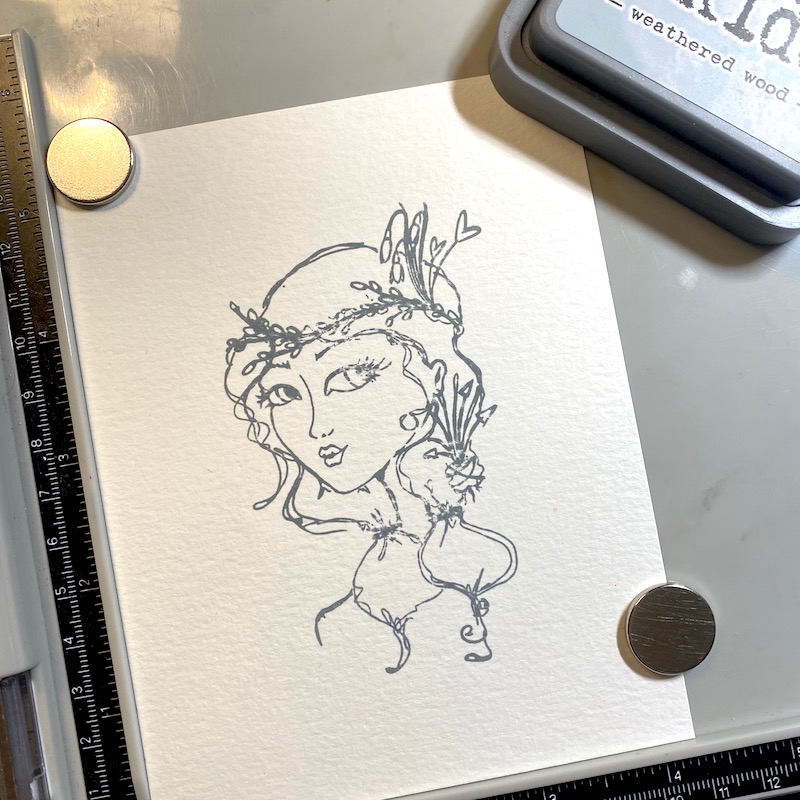 Step One: Stamp out on of the images from the Earthy Girls stamp set onto a piece of Watercolor Paper cut out to 4.25×5.5 inches using some water-soluble ink. I used Weathered Wood Distress Oxide.
 Step Two: Using clean water and watercolor paint brush, fade the ink out over the watercolor paper, making the stamped image look bright and bold.
 Step Three: Using ECD’s Watercolor Palette, add touches of color to the stamped image.
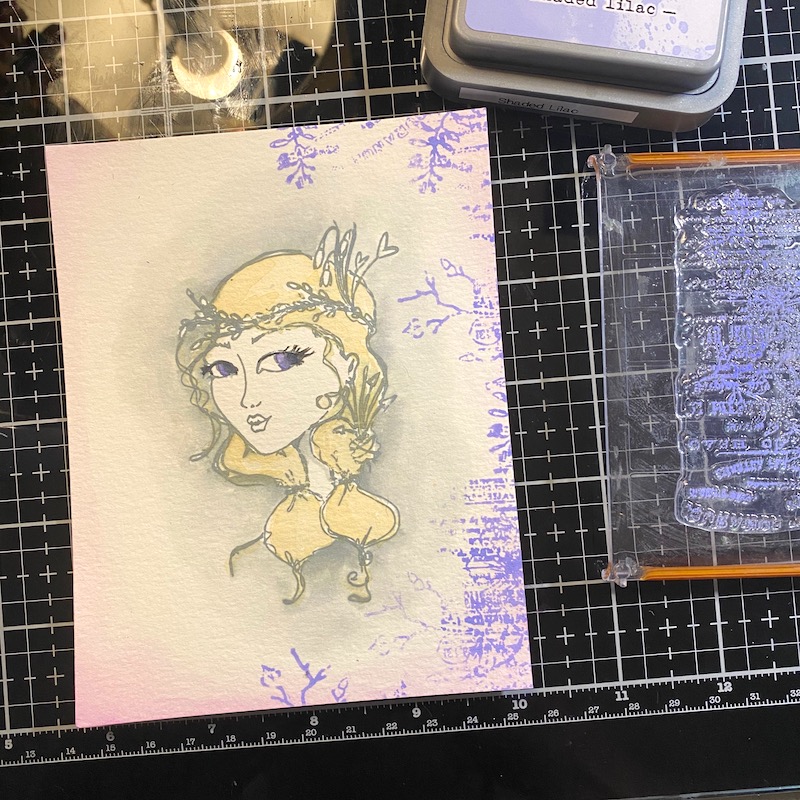 Step Four: Hand stamp around the edges of the watercolor paper background images from the Words & Layers stamp set using colored ink. I used Shaded Lilac in Distress Oxide.
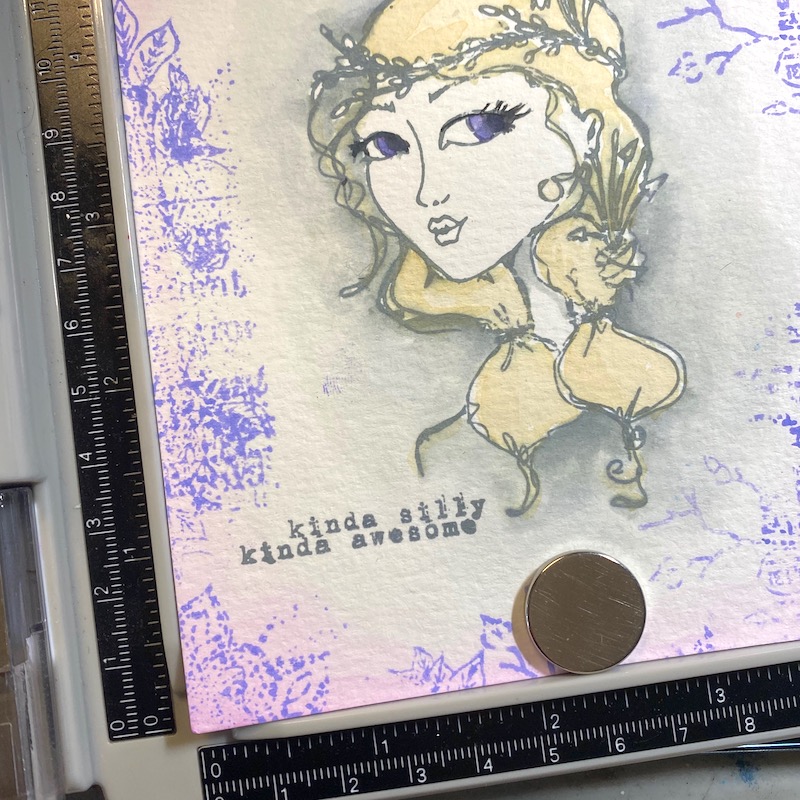 Step Five: Add a sentiment to the image from the Words & Layers stamp set. I used Weathered Wood Distress Oxide.
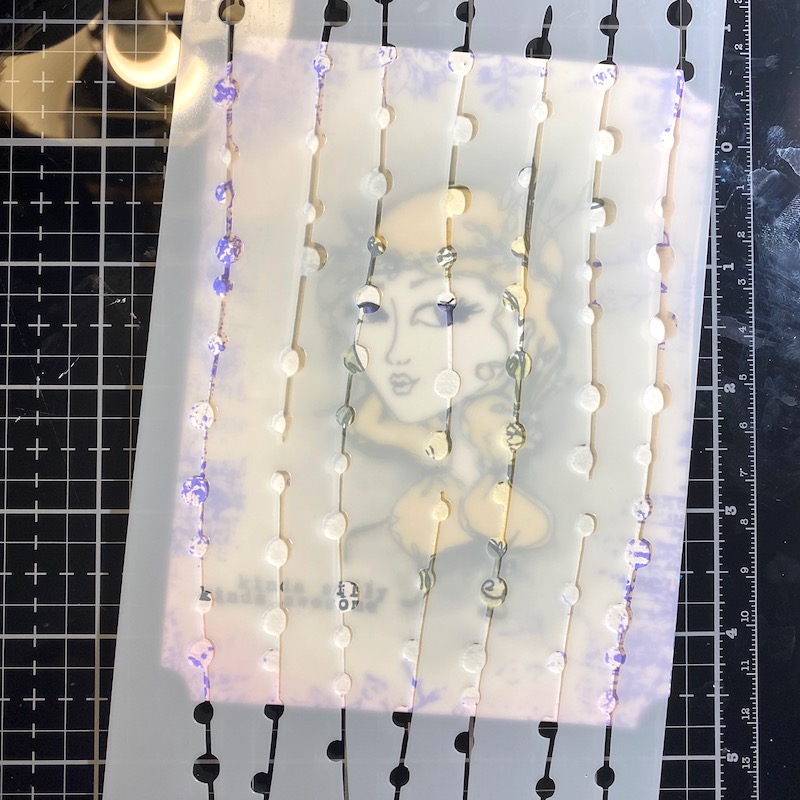 Step Six: Add texture to the card using the Dot Dot Dot… stencil and add gel medium through the openings.
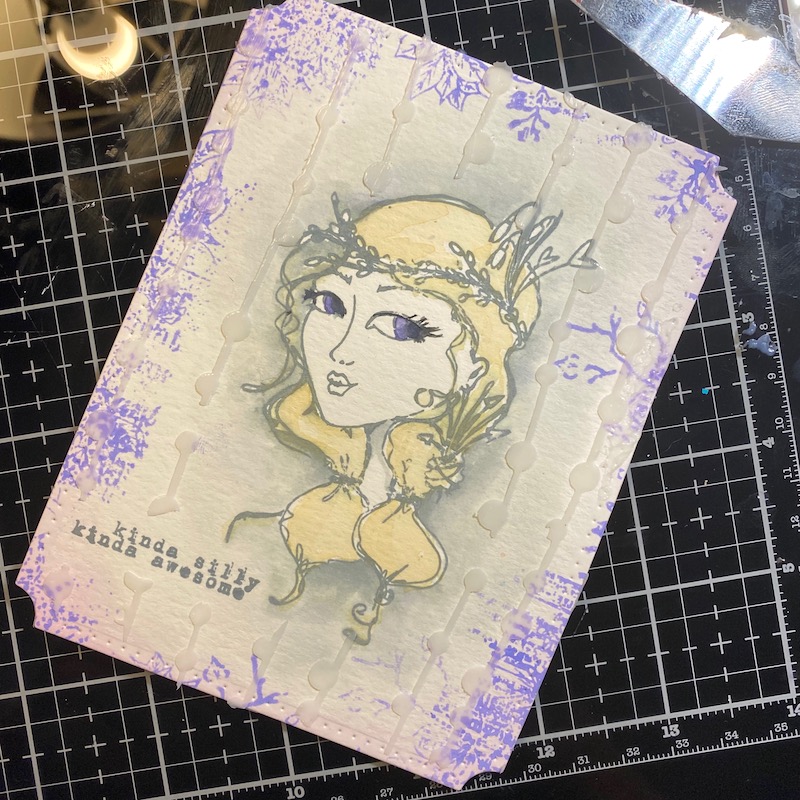 Step Seven: Let the gel medium dry.
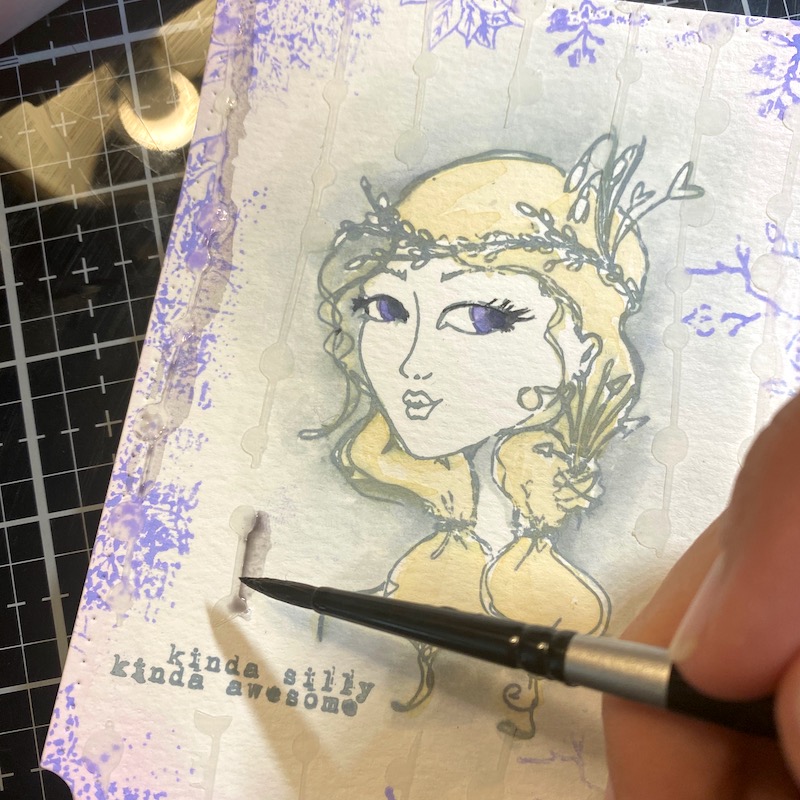 Step Eight: Highlight the stenciling by adding muted watercolor around the raised portions.
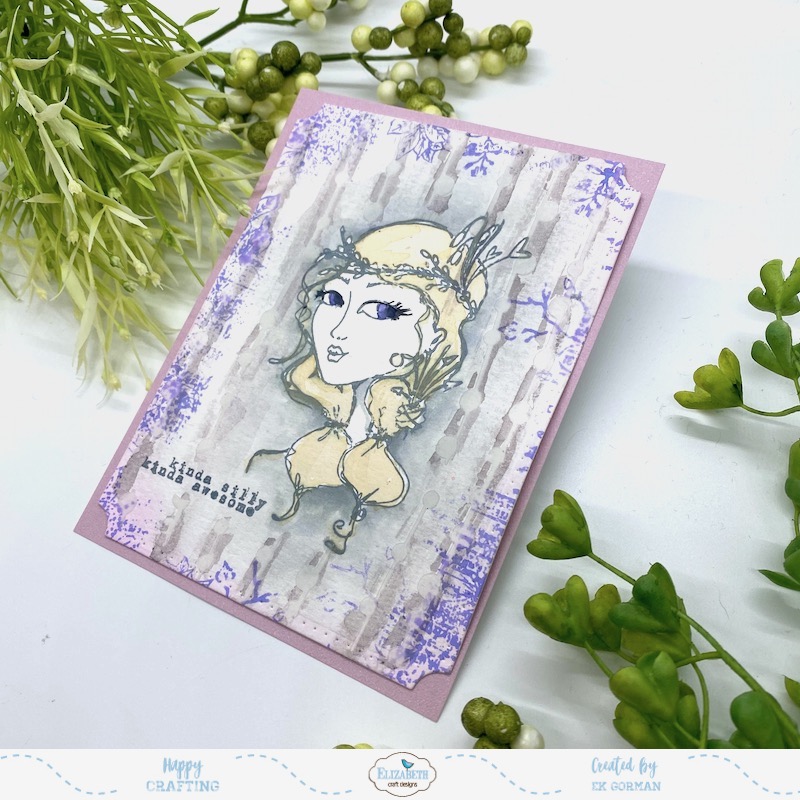 Step Nine: Die cut the watercolor paper with the Stitched Indented Rectangle die set and adhere it to a piece of trimmed Dusky Lavender Soft Finish Cardstock trimmed to 4.25×5.5 inches using 10mm Clear Doubled Sided Adhesive. Add the Soft Finish Cardstock to an A2 card frame.
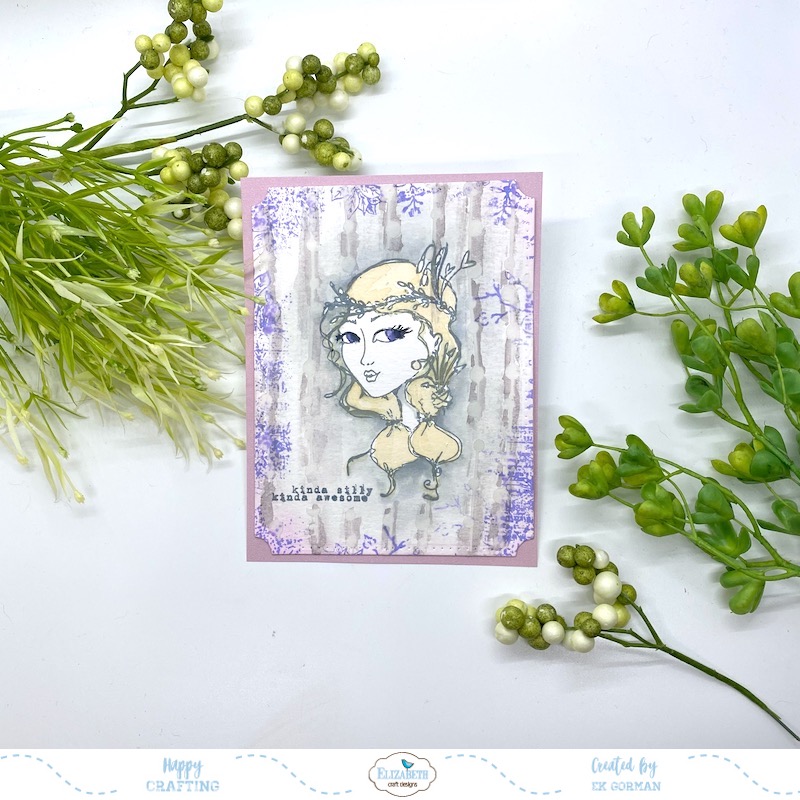 I love how the pale grey and purple tones have a vintage vibe, but in a fun colorful way.


