Karen here today. Today, I am sharing a couple Sidekick sized scrapbook pages as well as a card. I decided to use one of Joset’s newest designs, the Daffodil, as embellishments on both.
First up today is a card I made using the Daffodils die. I cut the petals and stems from patterned cardstock and green cardstock respectively. Then I layered them up on a Stitched Hexagon. I cut another smaller sized hexagon out of the middle of it. This piece was layered up on a Stitched Rectangle die, cut from 90 lb White Soft Finish Cardstock, over a piece of the yellow patterned paper. The cardbase is also cut from 90 lb White Soft Finish Cardstock. I added a sentiment, some diamond dots and some twine!
Next I chronicled a fun date my guy and I had to see the Eagles concert. I love the fun and funky paper and felt like the Daffodils just added more fun. I used Sidekick Essentials 19 as the page base and added a couple of Stitched Circle die cuts and a fun little pocket cut from dies in the Sidekick Essentials 14 set. I love the flower reinforcement found in the 19 set as well as the little squares that are found in one of the Reinforcement Variety Packs. The letters were cut from dies in the Planner Essentials 23 set.
On the back of the page, I added another Daffodil, some pictures and another Stitched Circle (as well as just a bit of journaling!)
Thank you so much for stopping by today!
Craftily yours, Karen
Supplies from Elizabeth Craft Designs
Other Supplies
Patterned and green cardstock, Black ink, Happy Birthday Sentiment, diamond dots, twine
Hello again everyone, Annette Green here today with a few ideas on how to use the new Photo Pocket Pages (designed for the regular planner) in your Sidekick planner. I was curious to figure out if this was possible, so I did some experimenting and came up with something fun you may like to try. I’ve created a “Craft With Me” style video as I created my pages and I share the steps to altering the pocket pages.I returned to my nature planner which is the Espresso Sidekick to create a few simple pages. The pocket pages are great to work with because not only do they protect my photos, they allow for some fun layering ideas and that interesting “see through” effect to the pages behind them. The first page option is to simply trim the top and bottom off the narrowest pocket page in the package, as shown on the left here.I’ve created this split-in-two pocket for a second option, as you’ll see in the video. All you need is a craft knife, ruler and mat. The pages cut easily and also sew quite nicely on the sewing machine. If sewing isn’t your thing, closing up the cut edge can easily be done with some washi tape or coordinating paper. I hope you take a moment to check out the video, and perhaps you’ll give this a try too.
Karen here today. I’m sharing both a card and a Sidekick-sized scrapbook layout I made with one of Joset’s new critters, the Beaver! He’s super sweet, and I thought he would make a great embellishment for my scrapbook page for a day out in the garden with my guy and his dog. He also is, of course, a great embellishment for those cards!
First up is the card I made. I used 90 lb Soft Finish Cardstock to cut the pieces for the Beaver and colored them up with Distress Ink in Antique Linen and Vintage Photo. The eyes and nose are colored with Copic Markers. I used a birthday sentiment from the Life is Better on the Farm Collection and cut it out with a Planner Label die. I thought the G45 paper was perfect with that sweet Beaver.
On the “back” of my Sidekick sized scrapbook page, I used the Beaver again to decorate my page. The base of this page is cut with Sidekick Essentials 4 and the scalloped overlay is Sidekick Essentials 12. The plants I used to embellish this page are also in Sidekick Essentials 12.
The Beaver on my scrapbook page was cut mostly with Kraft cardstock (the eyes are done in White Soft Finish Cardstock), but I colored it with the same Distress Inks. I usually lay the pieces out as I would be gluing them together and then divide them up by color. I used 101mm Double Sided Adhesive on the back of the pieces on top so I can make putting it together easier.
On the front of the page is a pic of my guy and his dog. I used lettering from Planner Essentials 23 and 37. The shovel and the clippers are from Sidekick Essentials 12 and are colored with Copic markers. I added a Fitted Heart to the top. My guy and his dog are two of my favorites!
Thank you for stopping by today and checking out my projects.
Craftily yours, Karen
Supplies from Elizabeth Craft Designs
Other Supplies
Distress Inks, Copic Markers, Patterned, Shiny Green and Kraft Cardstock, Black Ink, Lace, Twine
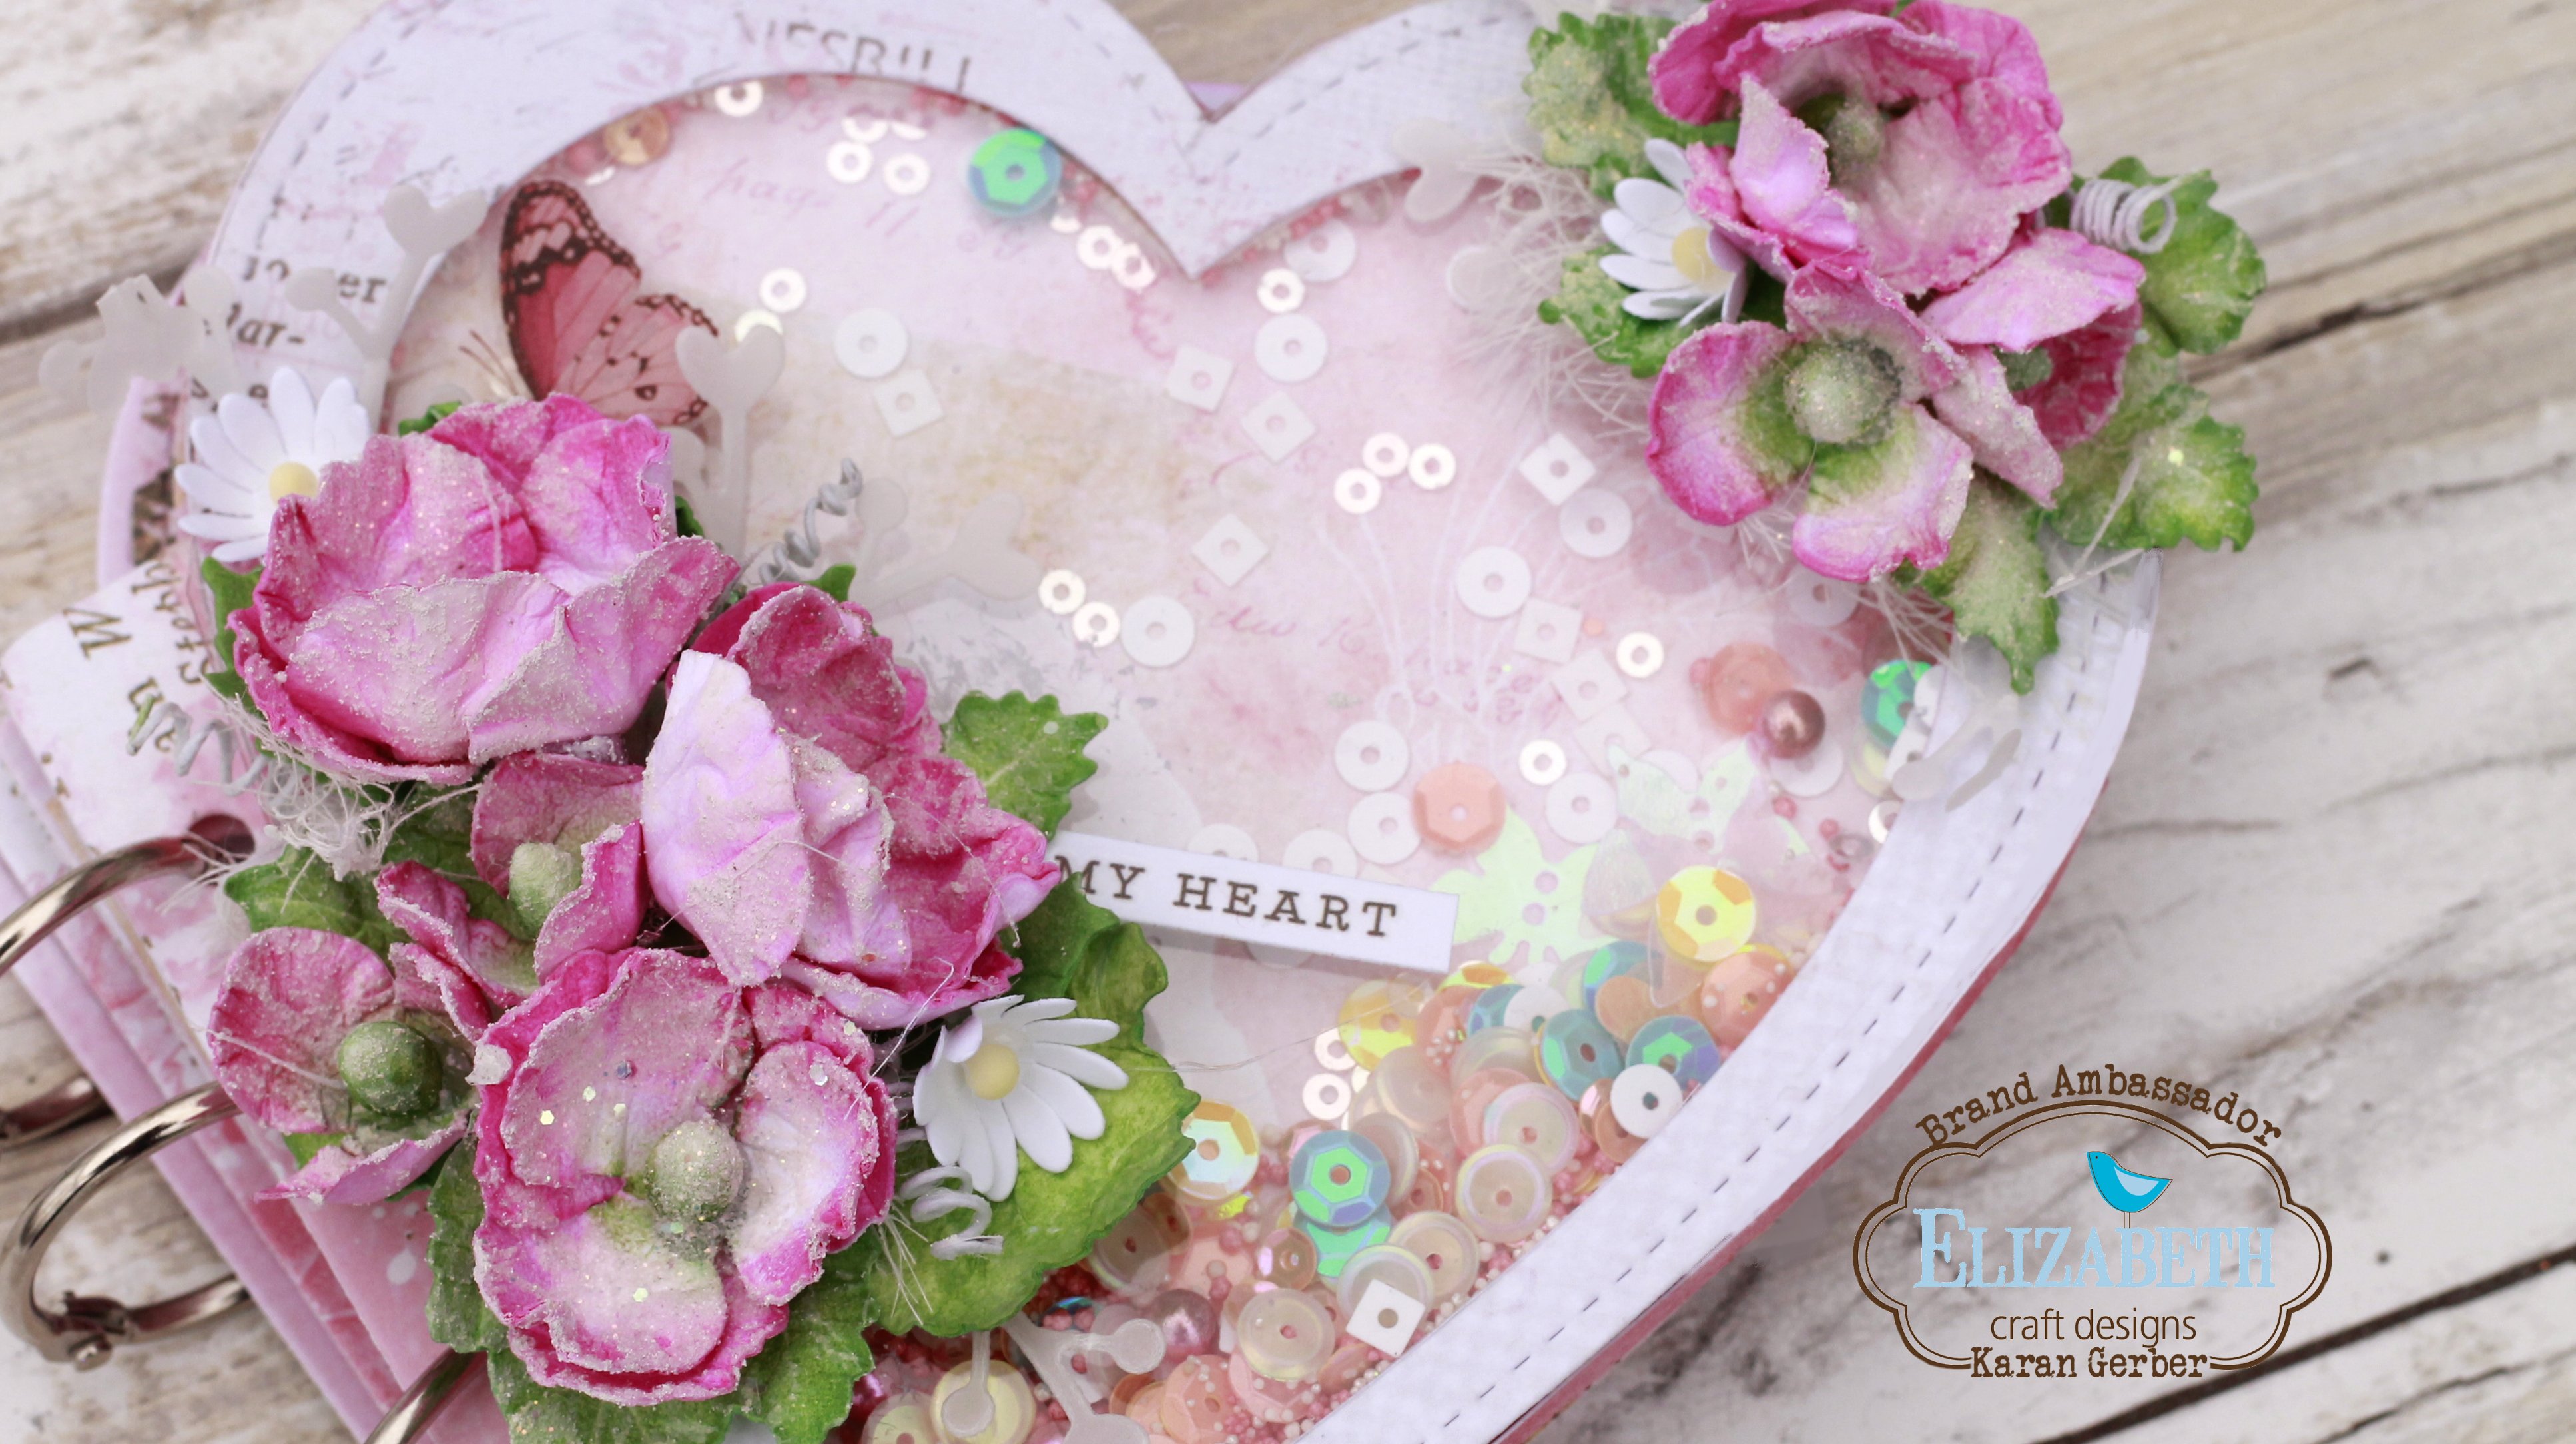
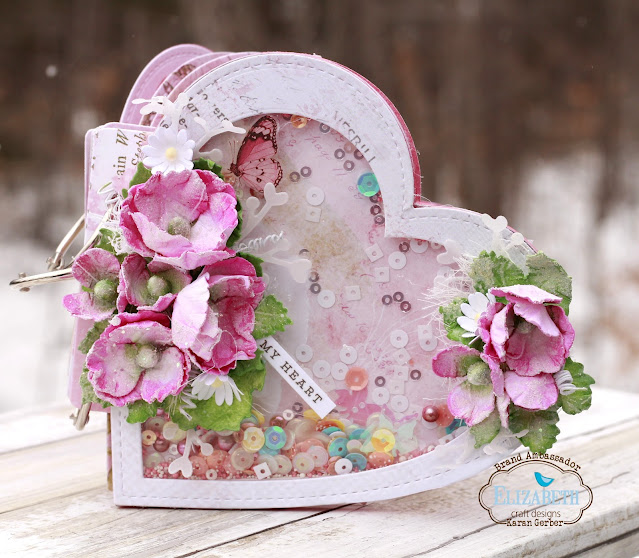
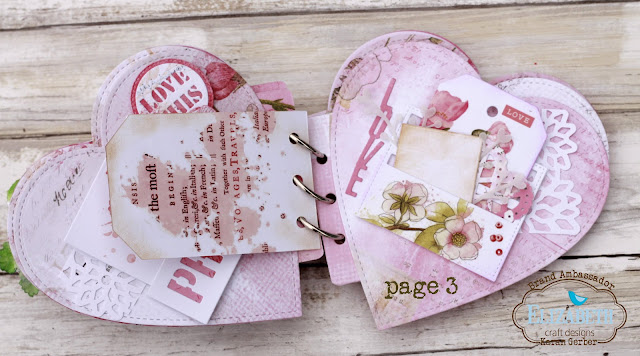
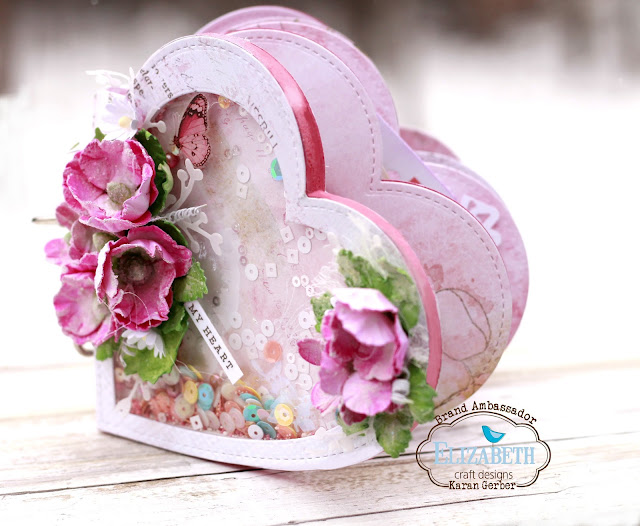
Hello Friends, welcome back, it is Karan Gerber on the blog today to share my first project for February. With Valentines coming soon, I had an idea to create a mini album from the Heart Shaped Dies.
I used Florals 4 on the Cover, coloring them with Picked Raspberry and Mowed Lawn Distress Inks. Here are some details of the mini album I created.
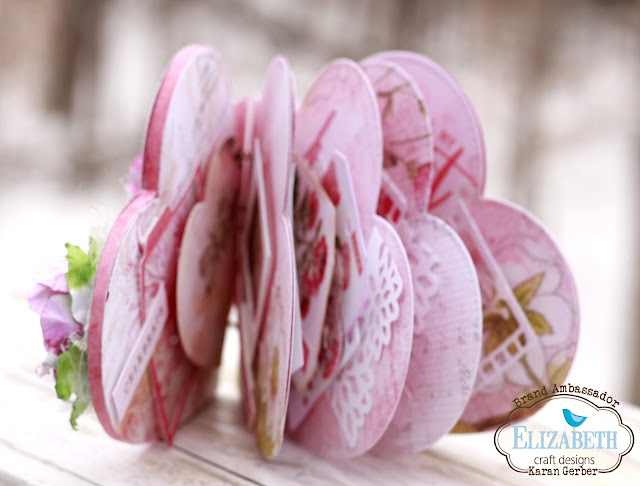
I created a shaker box on the front cover using acetate under that fist paper layer and then adding two layers of foam tape. The side of it actually looks like one of those heart shaped candy boxes you see.
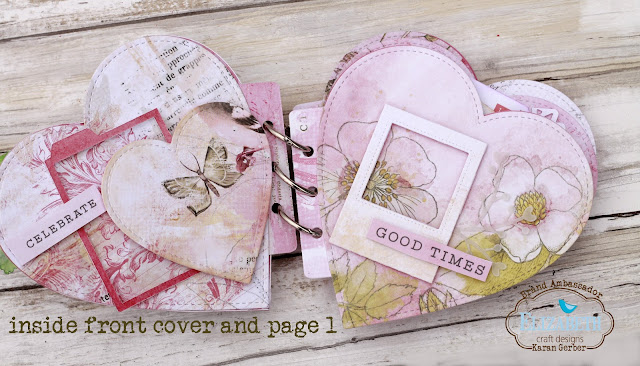
Inside front cover and first page. Here I used Planner Filmstrip (1656) and die cut the smaller frames from that set and die cut a heart. The sentiments are from the paper pack. To get the pages to work in an album, I die cut the page connector from Sidekick Essentials 16 and attached it to the back of each of the pages.
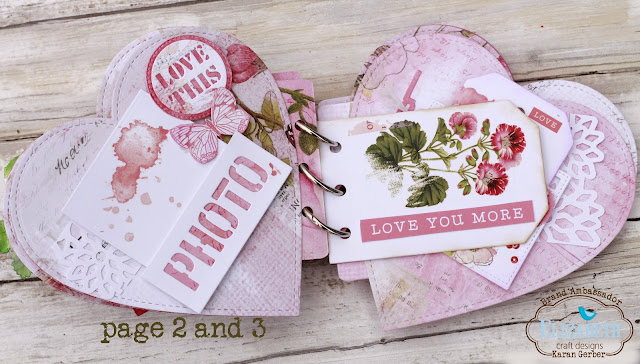
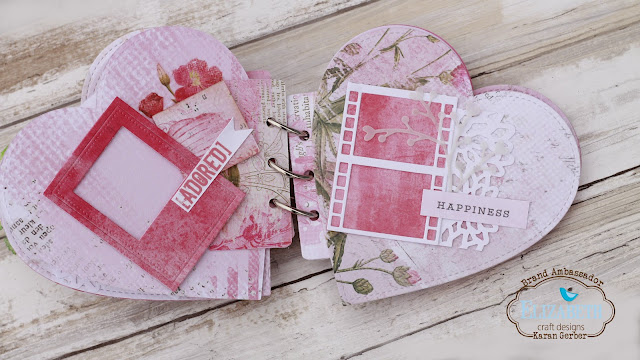
For page 2 and 3 I used Planner Essentials 3 and cut down the photo frame to suit the size of the page. The tag is from Planner Essentials 4 which I basically used as an insert here.
Page 3 and reverse of the tag. Here I used Planner Essentials 2 adding some rubons to the slide in die for the tags.
For page 4 and 5 I used the Planner Film Strip.
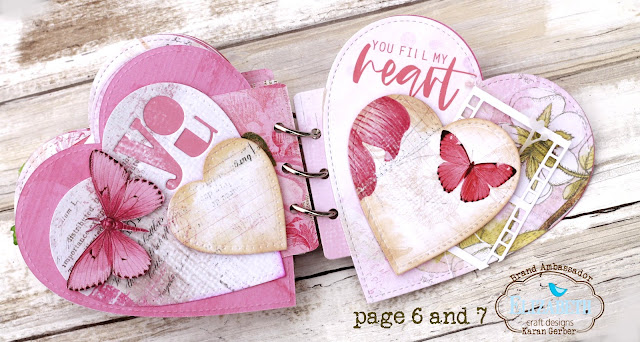
Page 6 and 7 which are the last pages of this cute little mini album. I used some heart die cuts, the filmstrip as well as the die cut “You” from Sidekick Essentials 2.
It was a fun little project to do, and I hope you give these heart dies a try to create your own little mini album.
Hi everyone, Katie here with my very first blog post as part of the Elizabeth Craft Designs Ambassadors Team. I am super excited to show you how I created this very cute but simple Heart Planner pages featuring Joset’s adorable elephant die.
First I cut out two elephants from Joset’s Collection. Then you will need to cut out two extra feet for Miss. Elephant all out of light grey card stock. Next I cut out the inside of the ears with light pink card stock. Then I gently inked my elephants with a dark grey ink, and dark pink for the ears. From the Planner Essentials #20, I cut out the word LOVE from light grey card stock and the background from dark grey cardstock. From the Sidekick Planners #2, I cut out the word YOU from Light grey and background in dark grey cardstock. The Hearts are cut from red card stock.
Making the Heart Planner pages and using the Elizabeth Crafts Woodgrain Paper. I then cut out the Large Heart from Planner Essentials #20, from the Reminiscence Book #2. Then cut the small Heart Page and the Photo Mats. I also cut out the Large Heart using 80lbs card stock and attached the woodgrain paper to it. This makes it a bit more durable in my planner album. Before I start attaching my papers and reinforcements, I inked my edges with brown ink.
After my base pages and photo mats are attached, I used pop dots to add my Miss and Sir Elephant to my planner pages. Then I pop dotted the word LOVE and YOU and adhered my hearts with glue. I love to speckle my pages, so I lightly speckled my pages with white paint.
I hope you found some inspiration from my post today, Have a wonderful craft day! Katie
Hi Friends and welcome to my last blog post for the year for Elizabeth Craft Designs. It was a little over a year ago when I first began my journey with Elizabeth Crafts. Creating with their florals and A5 Planner dies this past year has been so much fun. I just couldn’t close out my year without sharing one final Christmas Card.
At this point, I am not sure what 2022 will bring with Elizabeth Craft Designs, but I hope you love my final project.
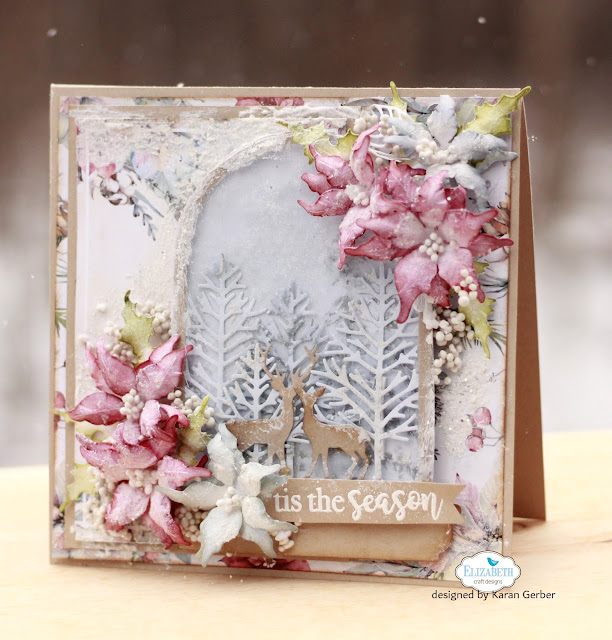
The florals were designed using Florals 12. I know I have shared a lot of projects with these florals but Christmas to me isn’t just a day, it isn’t just a month, it’s a season. And this Season my family and I have much to be thankful for! So with Christmas season upon us, I set out to create one last Christmas Card for 2021.
Here on St Joseph Island, we see deer all the time. They are almost sighted each day we head out for errands. I couldn’t resist creating a shaker card with Joset’s Snow Globe and those deer and trees from the Winter Scenery Set.
To begin with, I cut out the globe on pattern paper and on craft cardstock and than traced it out on acetate so I have a full size piece for the front of the globe. I fussy cut out foam tape and taped the back trim of the die to create a shaker card. I placed glitter on the inside of the shaker.
I cut four of the trees from the Winter Scenery Die Set and cut thin strips of foam tape to adhere to the back of the trees to add some dimension to the globe. I adhered the deer from the Snow Globe Sidekick Set to the front. I just love how this looks, it creates an awesome winter scene in that globe doesn’t it?
Die cutting out 6 large and 6 medium florals along with 6 leaves I colored and shaped them (if you are a member of the Elizabeth Crafts family Group on Facebook, I did a Live on Friday, Dec 17th and you can see just how I shaped and created those gorgeous florals here: Live Facebook with Karan. If you are not a member, be sure to become one so you can view the replay)
So getting back to my card, I stamped and heat embossed my sentiment from the Classic Christmas Sentiments set using White Embossing Powder and attached that to the bottom of the card.
My final step was to add snow paste and I thought some Art Stones would be a nice touch and look like snow balls around the florals.
Thank you for following me along this year with my craft shares for Elizabeth Craft Designs. Have yourself a Merry Christmas and I am praying that 2022 will see us all back to normal. Blessings for a bright, prosperous and Healthy 2022!
Yes it was snowing when I took this photo, so fitting for the style of my card Happy Scrapping and I hope to be sharing more with you in 2022!
Karen here today. I’ve been documenting the adventures that me and my guy have been having in a Sidekick journal. Sharing today a couple of recent adventures. I’ve created quite a few of these pages since we started dating seven months ago, and it’s already so fun to look back through the FuN!
A couple weeks ago, we flew to Vegas for a couple days. One of the outings we had while we were there was to see a Rod Stewart concert. Omigosh, he is SO good. The page base here is from the Sidekick Essentials 7 set. Those fun stitched letters are from the Planner Essentials 37 set, and the arrow is from the Planner Essentials 41 set. On the front here, I also also used reinforcements that are either in the Reinforcement Variety Pack 1 or 2 or were a fun surprise in another set. The “Amazing” at the top is from the Pieces of Life 3 – Quotes stamps.
This is the backside of the “Rod” page. The sentiment at the bottom is also from the Pieces of Life 3 stamp set. The “beautiful” flag is in the Sidekick Essentials 7 die set.
Next up was a FuN adventure we had to see our local professional basketball team. My guy works for a company who was able to get him front row seats. Wow, those basketball players are SO tall. And our team won! The page base here is from the Sidekick Essentials 2 set, and the “Remember This Day” frame is from the Planner Essentials 42 set. Adding that to a picture was so easy since I added 101mm Double Sided Adhesive before sticking it down. How fun! To add interest to the picture, I die cut a few stacking Stitched Rounded Squares and added some white dots around it. (Our team colors are purple and white!) The “ribbon” on the page was the wrist band to get onto the floor of the game.
I realized in creating my page that I had more pictures that I wanted to add than I had space. I decided to cut a square in half to add a small triangle corner pocket. (I edged it with more of the wristband…)
This was a fun way to add just a few more pictures. The pic in the middle was sitting in my seat (not zoomed in). What a fun adventure!
Thank you for checking out my journal pages today!
Craftily yours, Karen
Supplies from Elizabeth Craft Designs
Other Supplies
Dymo labels, card stock, white gel pen, enamel dots, black ink
Hey Crafters! Katelyn here, sharing with you my For You Gift Envelope.
To create my For You Gift Envelope, I’ve used a variety of dies from the Planner Essentials and the Sidekick Essentials Collection as well as dies from the Paper Flowers Collection. You’ll want to read below as I share with you how to recreate my gift envelope at home.
Step One. Choose a piece of patterned paper out of the Reminiscence the Book 2. From the Sidekick Essentials 16 – Seed Packet Set, you’ll need the seed packet. Die cut the seed packet out of the patterned paper. Ink the edges of the packet using Walnut Stain Distress Ink and a blending tool with foam.
Step Two. From the Planner Essentials 37 – Letters & Numbers die, you’ll need the letters to spell out For You. Die cut the letters to spell each word out of a piece of kraft cardstock. Ink the edges of the letters using Walnut Stain Distress Ink and a blending tool with foam.
Step Three. From the Maple Leaves die, die cut both maple leaves out of a piece of White Soft Finish Cardstock. Using a blending tool with foam, blend Ripe Persimmon Distress Ink on each leaf. Using a blending tool with foam, use Ground Espresso Distress Ink to highlight areas on the leaves as desired.
Step Four. Die cut the Lacy Leaves out of a piece of White Soft Finish Cardstock. Using a blending tool with foam, blend Forest Moss Distress Ink over the entire surface of the leaves.
Step Five. Assemble and adhere the seed packet.
Step Six. Adhere the lacy leaves and maple leaves to the left hand side of the seed packet as desired.
Step Seven. Adhere the For You words on the seed packet as desired.
Thanks for joining me today! I hope that I’ve inspired you to create your own version of my For You Gift Envelope at home.
Hey Crafters! Katelyn here, sharing with you my Hi Card.
To create my Hi Card, I’ve used a variety of the new dies from the Planner Essentials Collection as well as dies from the Sidekick Essentials Collection and Joset Designs. You’ll want to read below as I share with you how to recreate my card at home.
Step One. Choose two pieces of patterned paper out of the Reminiscence the Book 2. Die cut a 4″ Stitched Indented Rectangle out of one of the patterned papers. Die cut a 3 1/2″ Stitched Indented Rectangle out of the other patterned paper. Distress the edges of both rectangles. Ink the edges of both rectangles using Walnut Stain Distress Ink and a blending tool with foam.
Step Two. Choose another piece of patterned paper out of the Reminiscence the Book 2. Die cut a 3 3/4″ Fitted Indented Rectangle out of one of the patterned paper. Distress the edges of the rectangle. Ink the edges of the rectangle using Walnut Stain Distress Ink and a blending tool with foam.
Step Three. Choose a piece of patterned paper out of the Reminiscence the Book 2. From the Planner Essentials 37 – Letters & Numbers die, die cut the letters H & I out of the patterned paper.
Step Four. Next you’ll need a creamy piece of patterned paper out of the Reminiscence the Book 2. From the Sidekick Essentials 5 die, die cut the & symbol out of the patterned paper.
Step Five. From the Planner Essentials 41 – Rounded Corners Page, you’ll need one of the tabs. Die cut the tab out of the same patterned paper you just die cut the & symbol out of. Distress the edges of the tab. Ink the edges of the tab using Walnut Stain Distress Ink and a blending tool with foam.
Step Six. Fussy cut a tag, a herb piece and a tag out of the Reminiscence the Book 2. Cut the tag down to 2 7/8″. Distress the edges of each piece. Ink the edges of each piece using Walnut Stain Distress Ink and a blending tool with foam.
Step Seven. Next, you’ll need to choose one of the note pieces from the Planner Essentials 21 – Note Pieces die. Die cut the note piece out of a piece of patterned paper from the Reminiscence the Book 2. Distress the edges of the note piece. Ink the edges of the note piece using Walnut Stain Distress Ink and a blending tool with foam.
Step Eight. Adhere the 3 3/4″ rectangle to the 4″ rectangle. Adhere the 3 1/2″ rectangle to the 3 3/4″ rectangle.
Step Nine. Adhere the label 5/8″ from the bottom and 1/8″ from the right of the 3 1/2″ rectangle. Foam square the herb piece 1/4″ from the left and 1/8″ from the top of the 3 1/2″ rectangle.
Step Ten. Adhere the tab to the left side of the note piece as desired. Foam square the note piece 1/2″ from the top and all the way to the left hand side of the 3 1/2″ rectangle.
Step Eleven. Use adhesive and foam squares to adhere the tag 3/4″ from the left and 3/8″ from the top of the 3 1/2″ rectangle. Adhere the & symbol to the right hand side of the tag as desired. Adhere the H to the right hand side of the tag and adhere the I to the right of it.
Step Twelve. Cut a cardbase out of White Soft Finish Cardstock that measures 4″ x 10 1/2″, score at 5 1/4″. Adhere the cardfront to the cardbase.
Thanks for joining me today! I hope that I’ve inspired you to create your own version of my Hi Card at home.
Yeah I know I’m a little early on but oh it’s so much fun too!
It should be a little more spread out over the year but Christmas and Halloween are my favorite parts to create for.
This page is for my DDBD (December Day By Day)
The wish lists are there, and for me there is only 1 thing on the list.
I want……a white christmas. Snow!!!!
I made this page with the Planner Essentials 22 Top loading. He’s so much fun, one of my favorite die sets.
The paper I used is from Charlene and Ilse’s collection Mystical Winter.
And this super cute Santa, is from Joset’s collection. Wonderful to combine everything together.
The party just keeps getting bigger.
Here are the wish lists. The stamp is from my own collection, the text stamp is from E.C.D. CS157. So cute!!!
In the top loader I glued a package of a stamp set and used it as a shaker. There’s mica in it.
I made the text with the Planner Essentials 23 Retro alphabet trio.
The date is stamped in the background. For this I used the Long & Tall numbers with December stamped with the CS116 months. Unfortunately I no longer see it in the shop.
The page is finished with the snow stars from reinforcement pack 2 that have been edited with Silk Microfine Glitter Cool diamond.
This page makes me happy and I hope you do too.
Are you a little inspired again?!
Browse through the stuff you already have, there are so many fun things you can create…..let’s get started.