Browsing Tag

Planner Essentials

Joset Designs Planner Essentials Sidekick Essentials

Squirrelly about Camping!

March 30, 2022

Hi all, Happy Thursday!! Well how exciting is this my second blog post in one week!!! I am super happy to share with you my squirrelly camping pages. This squirrel die set is my new addiction I can not get enough of these squirrels. They are super fun and easy to make, so lets get started.

Step 1: Cut your main pages with your designer paper using Planner Essentials #4, next I cut out two strips of designer paper measuring 3″ x 8 1/4″ and inked the edges with brown ink. Then I adhered the paper strips to the left hand side on the left planner page and right side on the right planner page. Then cut two mats from coordinating designer paper with the round mat die from Planner Essentials 22 and adhere them to the center of your pages as per the picture above.

Step 2: Out of dark and light brown card stock cut out your two squirrels from Joset’s collection #1930 and ink the edges with brown ink. I added a little pink to the cheeks and highlighted with a white gel pen. After your cheek’s are dry I assembled my squirrels as per the picture above. With the Tent Die #1669 cut out your latten from red and yellow cardstock, ink with brown ink and assemble.

Step 3: Out of designer paper cut one tent – cut your poles from dark brown cardstock ink and assemble. Using Forest Accessories Die #1688 cut out your mushrooms with red, white and a light tan colored cardstock. Next I cut out the logs, stump and stick from woodgrain paper to create a cool texture. The bushes are cut from light and dark green cardstock, cut one marshmallow from white cardstock and ink with a bit of grey around the edges. My final step is to ink all the edges and assemble as per the picture above.

Step 4: Assemble and adhere your left planner page as per the picture above, the squirrel is pop dotted using some foam dots or tape.

Step 5: Assemble and adhere your right planner page as per the picture above, the squirrel is pop dotted using some foam dots or tape.

Step 6: Once you have assembled both your pages, I cut the word PHOTOS from Planner Essentials 31 and the clip from Sidekicks Essentials 5 all cut from dark brown cardstock.

Step 7: Attach your choice of reinforcement rings.

Last step is to add your favorite pictures and attach your clip and PHOTOS word.

**Optional** I always love to add a little white paint by speckling.

I hope your enjoyed todays blog post! Have a wonderful crafty day. >Katie<

Elizabeth Craft Designs supplies:

Planner Essentials

Making week 5: Planner Essentials 41 with a twist

February 17, 2022

Hello my fellow crafters and welcome. My name is Devid and I am so happy to be back on the Elizabeth Craft Design blog. One of the things I love about the dies from the Planner Essentials collection is the versatility of them. I was thinking about what to do for week 5 and then it hit me. I decided to use the Planner Essentials 41 Rounded Corners Page but to use it in a different way: Make pockets out of it. And I am happy to see it worked out perfectly.

step 1: Die cut all the elements you need. Since I used thin paper for the base page I used the thicker paper from Reminiscence the book 3 to create the mat layer
Using the die with the 2 windows I cut out 2 pieces. one from the thiner paper I used as a base page, one from the thicker card. I want to make the pockets out of this die so I needed this to be more firm.
Step 3: Using the Elizabeth Craft Designs Clear Double Sided Adhesive tape (I used 6 mm but you can use wider) on the back of the Matt layer and attach to the base page

I realy hope you like this one as much as I did! All products I used are listed below. Thank you for reading along and I hope to see you soon again!

Elizabeth Craft Design supplies:

other used supplies:
  • Ranger Distress Ink Frayed Burlap
  • Idea-ology – Tim Holtz- Tiny Attacher
  • Idea-ology – Tim Holtz – 12 x 12 Vellum Paper Stash – Wallflower
  • Versafine ink black onyx

Sidekick Essentials Uncategorized

Altering Photo Pocket Pages to Fit the Sidekick

February 14, 2022
Hello again everyone, Annette Green here today with a few ideas on how to use the new Photo Pocket Pages (designed for the regular planner) in your Sidekick planner. I was curious to figure out if this was possible, so I did some experimenting and came up with something fun you may like to try. I’ve created a “Craft With Me” style video as I created my pages and I share the steps to altering the pocket pages.
I returned to my nature planner which is the Espresso Sidekick to create a few simple pages. The pocket pages are great to work with because not only do they protect my photos, they allow for some fun layering ideas and that interesting “see through” effect to the pages behind them. The first page option is to simply trim the top and bottom off the narrowest pocket page in the package, as shown on the left here.
I’ve created this split-in-two pocket for a second option, as you’ll see in the video. All you need is a craft knife, ruler and mat. The pages cut easily and also sew quite nicely on the sewing machine. If sewing isn’t your thing, closing up the cut edge can easily be done with some washi tape or coordinating paper. I hope you take a moment to check out the video, and perhaps you’ll give this a try too.

Elizabeth Craft Designs Supplies:

Fantasy Flowers Paper Flowers Planner Essentials Sidekick Essentials

You Have my Heart

February 3, 2022

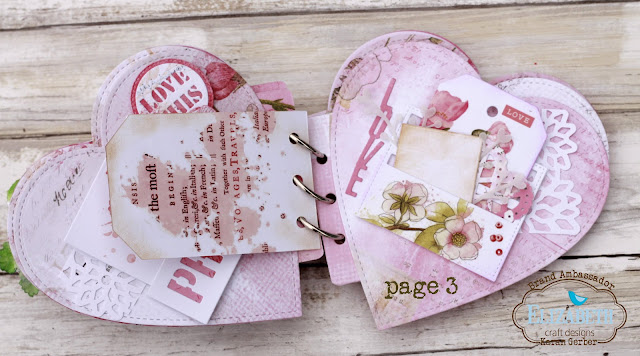
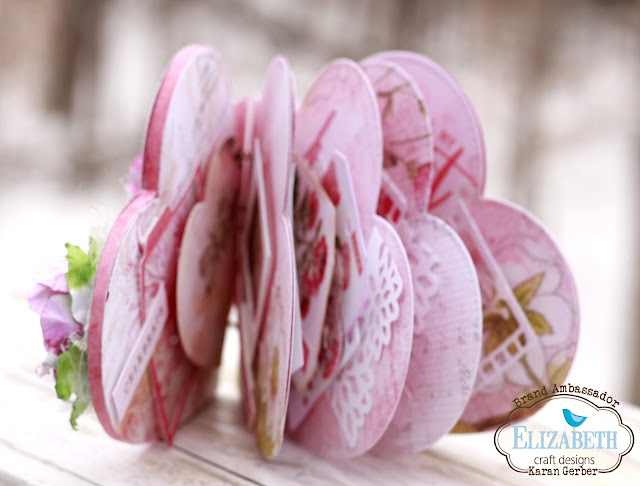
Hello Friends, welcome back, it is Karan Gerber on the blog today to share my first project for February. With Valentines coming soon, I had an idea to create a mini album from the Heart Shaped Dies.

I used Florals 4 on the Cover, coloring them with Picked Raspberry and Mowed Lawn Distress Inks. Here are some details of the mini album I created.

I created a shaker box on the front cover using acetate under that fist paper layer and then adding two layers of foam tape. The side of it actually looks like one of those heart shaped candy boxes you see. 

Inside front cover and first page. Here I used Planner Filmstrip (1656) and die cut the smaller frames from that set and die cut a heart. The sentiments are from the paper pack. 
To get the pages to work in an album, I die cut the page connector from Sidekick Essentials 16 and attached it to the back of each of the pages. 

For page 2 and 3 I used Planner Essentials 3 and cut down the photo frame to suit the size of the page. The tag is from Planner Essentials 4 which I basically used as an insert here.

Page 3 and reverse of the tag. Here I used Planner Essentials 2 adding some rubons to the slide in die for the tags.

For page 4 and 5 I used the Planner Film Strip.

Page 6 and 7 which are the last pages of this cute little mini album. I used some heart die cuts, the filmstrip as well as the die cut “You” from Sidekick Essentials 2.

It was a fun little project to do, and I hope you give these heart dies a try to create your own little mini album. 

Happy Valentines & Happy Scrapping!

Until Next time!

Karan

Elizabeth Craft Designs Supplies Used: 

Planner Essentials

Retro bus mini booklet – too much fun!

January 18, 2022

Hi fellow crafters, 

My name is Devid, and I am honored to be a new Band Ambassador for the Planner Essentials collection. It is a great collection, and I am completely hooked. This is my first ever blogpost here for Elizabeth Craft Designs and I am super excited!

In this blog I am working with the fantastic new Retro Bus Special, in this case I am making a mini book. 

Step 1: Die cut all the pieces you need out of the cardstock. 

Step 2: I used cardstock with a colored core. Using a sanding block, I distressed the paper exposing the lighter core. 

Step 3: Using Distress ink Frayed Burlap to lightly color the edges of the main parts. This not only gives it a vintage look but also helps to create depth. Always remember: light brings forward, dark creates depth. 

Step 4: Distress the metallic parts with a sanding block and give it a rusty look using a rose gold gilding wax.

Step 5: assemble the cover page in this order: base page, base layer, cover layer, insert windows if you made these, add tires and finish with bumper, head lights, mirrors and other embellishments.

I hope you give this fantastic set a go and enjoy it as much as I did. Thank you for reading my process and see you for the next one! All products I used are listed below.

Elizabeth Craft Designs supplies used:

ECD Retro Bus Special kit
ECD Clear Double sided adhesive

Other products used:


Core-dinations cardstock
IDEA-OLOGY TIM HOLTZ PAPER STASH 8″ X 8″ – METALLIC 
Ranger Distress Ink Frayed Burlap
COOSA CRAFTS GILDING WAX – BRONZE
Florence Cardstock Kraft 200 gr.
Florence colored cardstock 216 gr.

Planner Essentials

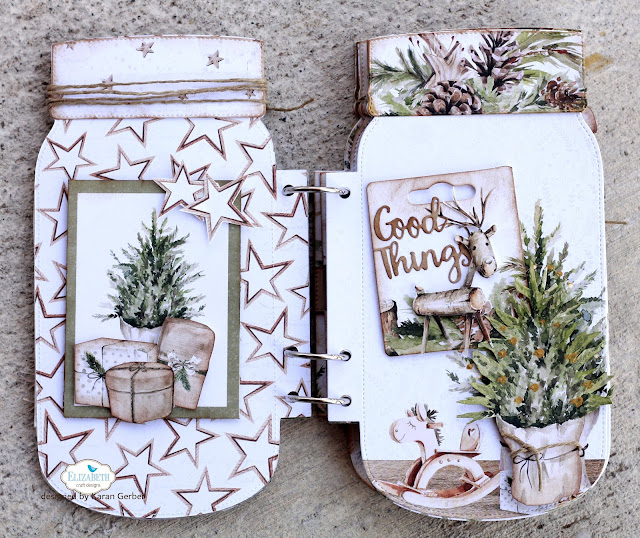
Hello Winter – Mason Jar Album

January 17, 2022

Hello friends and thank you for dropping by. It is Karan back to share another project with you and today I am sharing a mini album I designed using the Mason Jar Kit. To beging with this mini album has 6 pages in it, each page is cut twice (except for the cover which I cut three times to include the acetate).

I created a shaker on the cover. I die cut the front piece twice on pattern paper and once out on acetate, adhering the acetate to the front pattern piece cover. To create the shaker part of the cover I used foam adhesive and created strips all along that to allow me the depth I needed to add my shaker bits.

Adding some art stones, prills (to coordinate with the paper) and some sequins along with a bit of glitter that created the shaker. I also die cut and stamped the sentiment on the mini mason jar for my title. I tied that to the twine I had wrapped around the jar lid.

I die cut the trees from the Mason Jar Kit and thought the Village Edges would add a great detail to the cover. 
For the inside, here are the pages i created, this is designed using the Cozy Winter Collection from P13

I cut each page out twice so they would be thick, using the dies from Planner Essentials 30. I cut out tags and used those as photo mats throughout. 
I used some of the journal tags in the collection as photo mats as well, and fussy cut some details out to further embellish my mini mason jar album. 

I made sure to cut jar toppers for each page to add more detail.

This page has some tags from the collection that I fussy cut. I used the Stitched circle die to die cut the circle globe

tag on the right side of the page. I die cut the mini mason jar and used it as an element on this page too.

These pages have some photo mats tucked in the mason jar belly band. I used the circle label stamps here. 


I hope you give the Mason Jar Kit a try, it makes a gorgeous album. 

Karan

Elizabeth Craft Designs Supplies:

Joset Designs Planner Essentials Uncategorized

December Daily with Critters

December 19, 2021

Karen here today sharing days 7 and 8 of my December Daily album. I love making these albums each year. This year, I’m using many of Joset’s critters to embellish my pages. Seriously so sweet.

Day 7 includes the fun new Planner Essentials 48 – Forest Tree Page. (The Joy die is also in this set!) The page base is Planner Essentials 4. To apply the tree to the base, I used 101mm Double Sided Adhesive. I love the tree with the sweet Reindeer! The number is stamped from the Calendar Numbers set and the little “Peace on Earth” Sentiment is from the Cozy Days set. This page highlights a few ornaments on my tree that include pictures of my kids. I treasure those ornaments, for sure.

I just HAD to use a close-up of that sweet Reindeer. I love putting together these critters! It’s so relaxing, like when I used to play with paper dolls as a kid!

On the back of Day 7 is Day 8! I used the very sweet Penguin die to embellish this page. I added a couple Fitted Circles (and chopped them off at the edge. No page is complete (for me) without adding some fun reinforcements!

And finally, I couldn’t be done without a close-up of the ADORABLE Penguin. Once of my favorites! Thank you for stopping by today!

Craftily yours, Karen

Supplies from Elizabeth Craft Designs

Other Supplies

Kraft and Patterned Cardstock, Black Ink

Planner Essentials

Let’s Make a 2022 Planner!

November 14, 2021
Hello there! Annette Green here today to share my 2022 Planner and tutorial just for you planner fans!
I utilized Planner Essentials dies 3, 4, 6, 7, 44 and Planner Pocket 1 this year along with some pretty nature papers which I talk about in the video tutorial below.
I also used a few stamp sets: All The Details, Months, and Pieces of Life #1. All supplies are listed at the end of this post.
As I explain in the video tutorial, I tried not to overwhelm myself with too many dies. Once I chose those six mentioned above, I kept to them rather than having too many options in front of me. This helped a lot!
I love how this nature paper and the embellishments coordinate nicely with the new Desert Sand full-size planner. In the video tutorial I’ve developed a system for building the pages that you might find helpful, and less overwhelming. I also share lots of little tips along the way as I create each page. I’m thrilled that my 2022 planner is now complete and ready for the new year!
Planner Essentials Scrapbooking Sidekick Essentials Uncategorized

Some Sidekick Fun!

November 7, 2021

Karen here today. I’ve been documenting the adventures that me and my guy have been having in a Sidekick journal. Sharing today a couple of recent adventures. I’ve created quite a few of these pages since we started dating seven months ago, and it’s already so fun to look back through the FuN!

A couple weeks ago, we flew to Vegas for a couple days. One of the outings we had while we were there was to see a Rod Stewart concert. Omigosh, he is SO good. The page base here is from the Sidekick Essentials 7 set. Those fun stitched letters are from the Planner Essentials 37 set, and the arrow is from the Planner Essentials 41 set. On the front here, I also also used reinforcements that are either in the Reinforcement Variety Pack 1 or 2 or were a fun surprise in another set. The “Amazing” at the top is from the Pieces of Life 3 – Quotes stamps.

This is the backside of the “Rod” page. The sentiment at the bottom is also from the Pieces of Life 3 stamp set. The “beautiful” flag is in the Sidekick Essentials 7 die set.

Next up was a FuN adventure we had to see our local professional basketball team. My guy works for a company who was able to get him front row seats. Wow, those basketball players are SO tall. And our team won! The page base here is from the Sidekick Essentials 2 set, and the “Remember This Day” frame is from the Planner Essentials 42 set. Adding that to a picture was so easy since I added 101mm Double Sided Adhesive before sticking it down. How fun! To add interest to the picture, I die cut a few stacking Stitched Rounded Squares and added some white dots around it. (Our team colors are purple and white!) The “ribbon” on the page was the wrist band to get onto the floor of the game.

I realized in creating my page that I had more pictures that I wanted to add than I had space. I decided to cut a square in half to add a small triangle corner pocket. (I edged it with more of the wristband…)

This was a fun way to add just a few more pictures. The pic in the middle was sitting in my seat (not zoomed in). What a fun adventure!

Thank you for checking out my journal pages today!

Craftily yours, Karen

Supplies from Elizabeth Craft Designs

Other Supplies

Dymo labels, card stock, white gel pen, enamel dots, black ink

Planner Essentials

Halloween Mini Album with New Planner Dies and Stamps

October 2, 2021
Hello again everyone, Annette Green back again with some Halloween fun! I’ve created this mini album with the new Planner Essentials Halloween release by Esther and I’ve got a video tutorial just for you. This album proves that you can use planner dies for so many other things besides planner pages. I’ve used Graphic 45’s Midnight Tales paper collection, but feel free to use your favorite papers. I hope you follow along the video and enjoy the process. The supply list is below and also included in the description box of the video.
%d bloggers like this: