Browsing Tag

Mini Album

Inspiration from the Design Team Planner Essentials Scrapbooking Stamping

For The Record – Family Mini Album

October 11, 2022

Hello Creative Friends and welcome to the Elizabeth Craft Designs Blog today. It is Karan Gerber here to share a mini album project with you designed using the newest release For The Record.

i instantly wanted to create a mini album with it. I used the all of the new release dies, except one and the stamps too. For the cover, I cut one of large file pages in half to create a tab page.  All i did to do that, was to cut of a 3/4: piece off the left side, and line up the holes and punched it with a crop o dile. The cover was done that way and I used the Alphabet Tabs to create a title adding vellum to the back. 

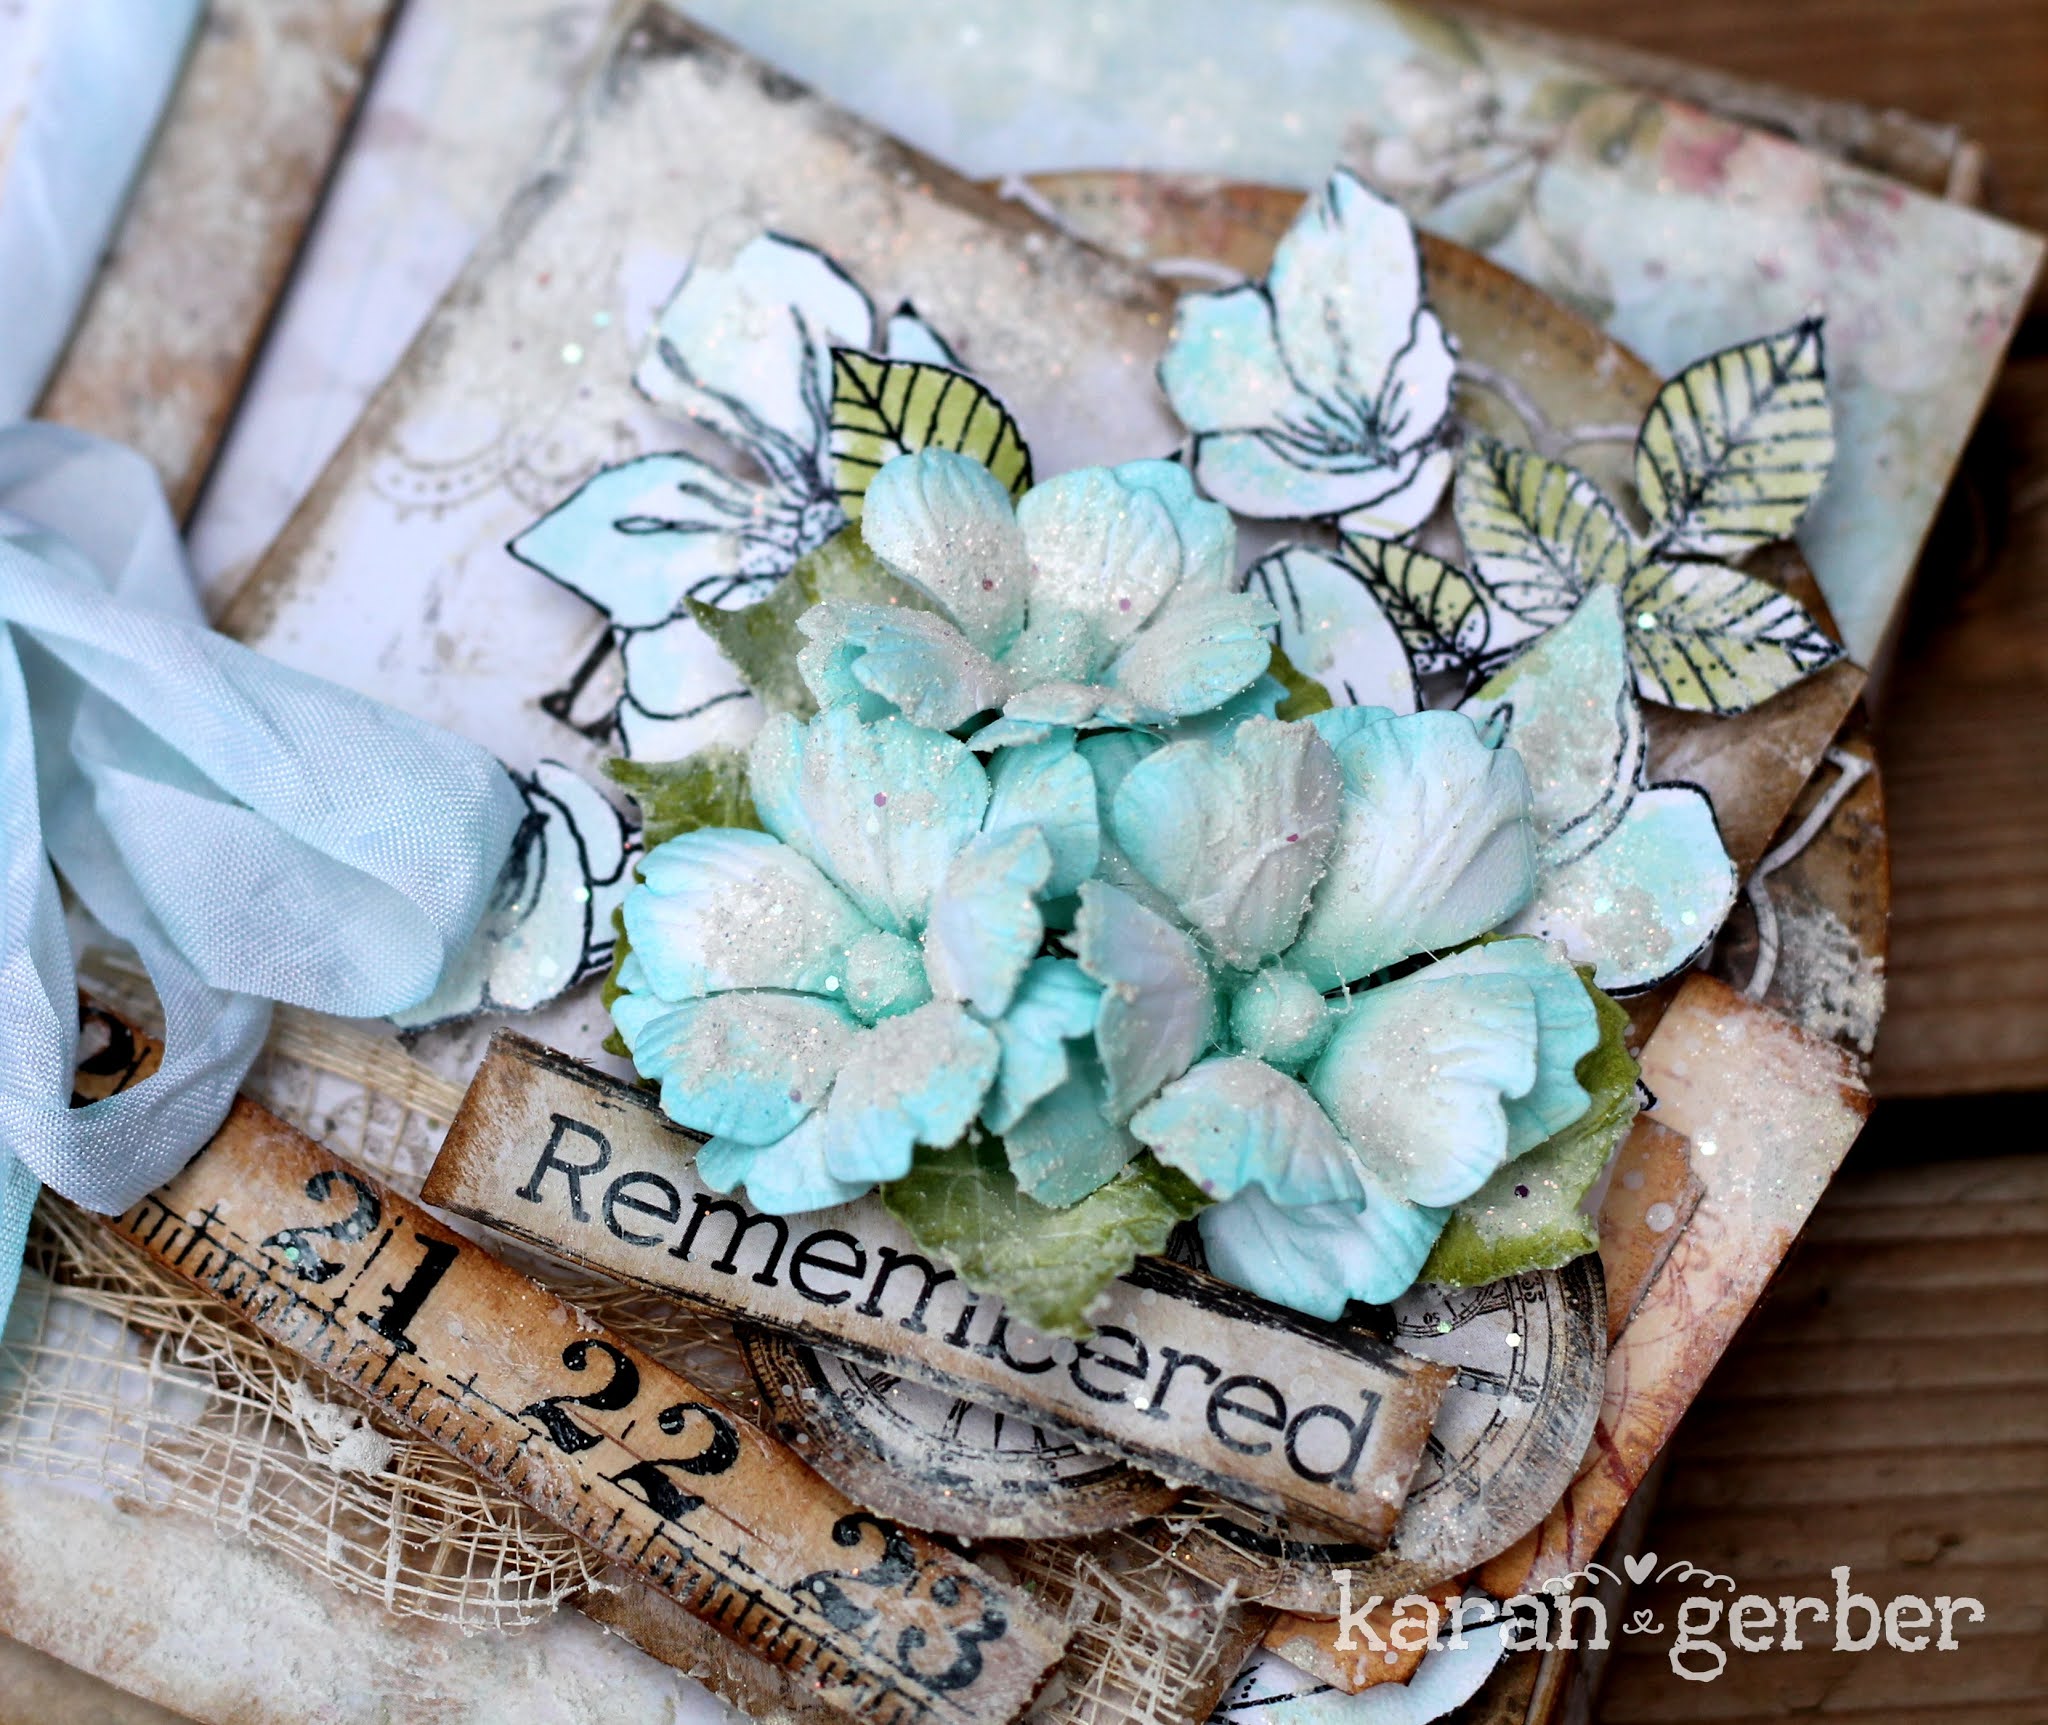
Above is the inside front cover and view of the first page. I used the Curved Library Pocket using the cut out in the front and covering that with vellum. 

I also stamped some mini tabs from the Filler cards and tucked those in the pocket, I used the filler cards throughout the mini. 
I added in some vellum pages using some rub ons from 49 and Market, they look fab on the vellum and what a great way to add some elegance to a little mini.

I used some of the filler cards here and stamped a couple of them too

On this page i used the filler cards again and the alphabet tab, and i used the negative, dont throw those out, you can use those letters

I hope you enjoy my project share today, and give the new “For The Record” a try and create some mini albums of your own. These would make a perfect stocking stuffer too. 

Joset Designs Planner Essentials Pop it Ups Scrapbooking Stamping Videos

Pop-Up Monster Mini Album

July 11, 2022
Hello, Annette Green here with a fun tutorial on how to make your own Halloween album with pop-ups, a Planner Essentials page die (#35) and of course the new release of Monster dies and stamps from Joset. I’ve got a video below taking you through all the assembly steps so I hope you have a moment to check it out.
Using the General Pop-Ups set (all links below) makes this a super easy and very impressive way to create interaction in this mini album. I’ve used Graphic 45 “Charmed” Patterns & Solids papers, but you can use whatever you have to recreate this.
Throughout the album, I’ve used lots of pieces from the new Party Time dies to create easy and fun embellishment on the pages.
The Monster Hugs stamp set is perfect with these cute monsters. I used one of the double pop-up dies here; one for the monster and one for the stamped expression.
Some of the photo mats, like the one shown here, are from the Stitched Indented Squares set. While some of the pop-up flaps open bottom to top, others open right to left like a card. You’ll have to watch the video to see who is behind this one!
I had the best time making these cute monsters. It’s really hard to stop! I hope you take a moment now to watch the video tutorial to see for yourself how easy this is to make. I hope you give it a try. Thanks for popping in today.
Inspiration from the Design Team Paper Flowers Planner Essentials Silk Microfine Glitter Soft Finish Cardstock

Merry & Bright Mini Album

November 10, 2021

Hello Friends and welcome to the Elizabeth Craft Designs Blog. It is Karan Gerber here sharing a project with you. Today I have a mini album to share with you. I designed this using the Florals 12 on the cover along with the Indented Stitched Rectangles and Stitched Fishtails. The inside boosts a few more of my favorites and I hope you enjoy. 

The papers are from Stamperia – Classic Christmas. I love the vintage feel to the images in this collection and they were perfect for photo flips throughout the album. 

Inside cover and first page. I free hand drew the curves pockets on the inside front cover and used the Indented Rectangles as photo mats throughout the album.

Page 2 and 3 – Indented Rectangles used again for photo flips. 

Above I used Planner Essentials 16 and created a pocket from that large tree. Photo mats will fit in there. Same with the Small Villages on page 5. Photo mats will slip in under the houses and trees on that page. 

For pages 6 and 7 I used the Stitched Indented Rectangles for the front of a side pocket. 

For he last page and inside back cover I used the Stitched Circles and Indented Rectangles. Lots of gold mirri paper was used throughout. 

I am attaching some detail photos of the cover for you. I hope you have enjoyed my project share for you today. 

Elizabeth Craft Designs supplies:


Paper Flowers Scrapbooking Soft Finish Cardstock Uncategorized

Hello Fall Photo Folio

October 30, 2021

Hello friends and welcome back! It’s Karan and I am here today to share with you a project designed using florals 5, on the cover on this Fall Photo Folio.

I love how this fall project turned out. Here in Ontario, Canada the fall colors have been very vibrant and I wanted to capture the colors in this folio.

The inside of Folio, is a tri fold. I created a photo flip in the center using the Indented Stitched Rectangles, I used Hay Ride( 1909) on the right page inside as and love those pumpkins. 

This is what the folio looks like when you open the cover. The paper is from Simple Stories and I didn’t want to cover up those gorgeous pumpkins just yet, so I might just leave this page empty.

The Stitched Indented rectangles are perfect for this photo flip, i cut four of them and scored the top over 1/2″ to score and fold over to create the flip. 

its a gorgeous little mini and I love how it turned out. 

The detail on those pumpkins is fabulous and this little Hay Ride was a great addition to this project. 

The flowers turned out beautiful. Die cut on Soft Finish Cardstock, colored with distress inks and seed beads in the center. 

Thank you for dropping by today, I hope i have inspired you to create a folio on your own.

Karan

Elizabeth Craft Designs Supplies:

Other Supplies:

Seam Binding, Simple Stories Paper, Distress Inks, Seed Beads

Paper Flowers Scrapbooking Stamping Watercolor

Remembered – Mini Album

August 11, 2021

 Hello Friends and Welcome to the EC Designs Blog. It is Karan here to share a project with you.

I know it has been awhile since i have posted crafty projects with our big move almost behind us, i am slowly getting back to creating. My first project is using their floral stamps and beautiful floral dies creating a gorgeous mini album.

My first project back is Designed using Florals 13. Which i have shaped into Wild Roses. I matched the color of them with the paper i used in my project. Using a foam bud as my center.


Stamping the Blossom set out on Soft Petal Cardstock from Elizabeth Crafts with black archival ink, i decided to use my water brush and dab color from the same pad i used to create my florals. Salvaged Patina Distress Ink. 

This project is designed as a mini folio on 49 and Market Accordion Flip Fold which comes with their new album as an insert. I thought it would make a perfect mini. 

The inside i still want to decorate but my new scrap space is very much in boxes, but i promise i will add more photos when i get to my Planner dies. 

I hope you have enjoyed my share with you today and I have  inspired you to create your own beautiful mini albums. 

Products Used:

Inspiration from the Design Team Paper Flowers Planner Essentials Scrapbooking Sidekick Essentials Soft Finish Cardstock Uncategorized

The Good Life – Seed Packet Mini Album

March 22, 2021

Hello Friends and welcome! It is Karan here to share a project I designed using the new Sidekick Release. For those who know how much I love albums, I also love to create mini albums too. 

This one is designed using the Seed Packet Die from Sidekick Essentials 16. 

To begin with I cut the seed pack out five times using paper from 49 and Market. I cut vellum to go on the inside of the packet for the window. I cut out extras thinking I might make the album larger but ended up going with 5 packets instead of 8.

Then I assembled them.

I then cut the side panel from the same sidekick set and created the pages and continued to decorate them. I love tags and cut out a tag for each page just as an added layer and photo mat for some of my photos. This tag was cut from Planner Essentials 2, which I also cut to go inside each opening of the Seed Packet page. I am going to share images from this little mini and then add the dies I used below. Hope you enjoy this mini project.

And then details for the cover:

I cut doubles for the large floral and the medium size floral for the cover, two sets of leaves and then I used the skeleton leaf from the Sidekick Essential 16 set. Ii love how the florals shape so beautifully.

I hope that I inspired you to create a mini album using this Seed Pocket Set. It makes a perfect little mini album. 

Until Next time

Happy Scrapping!


Sidekick Essentials 11; Sidekick Essentials 16; 

 Other Products:

 Vintage Photo Distress Ink; Crushed Olive Distress Ink

Art Journal Collection Charlene Stamps Planner Essentials Sidekick Essentials

Sidekick Mini Album

July 1, 2020

When I got the super cool stuff for the Sidekick planner and saw that incredibly cool envelope I immediately thought….That’s a lot of fun to make a mini album. So I did but it wasn’t easy. In the end I am very satisfied and now it’s standing in my craftroom.

I made 5 envelopes, but before I glued them together, I tied them first. Like you tie a book. I found a tutorial on You-tube.

I made a cover with craft-board and added a ribbon in between so you can close the book with a bow.

The pendant is made with shrink-plastic and a stamp.

In each envelope there is a card with a picture on it. The cards are made with the note pieces set and Planner Essentials 4

The paper that I used is for a laser printer and therefore nice and firm. I’ve decorated it with acrylic paint and the Gelli plate, my latest addiction.

Blue had just been given a new collar here. Unfortunately he didn’t enjoy it for long, a week later he died suddenly. 

And I’ve only ventured into the Selfies recently. I hate pictures of myself. Whose kids would have that anyway? hihi

For the closure I used eyelets, which was a bit fiddling with the Crop-a-dile but it worked.

This is what the bound book looks like before I glued it into the cover.

These are the dies I’ve worked with.

I thought it was a great project to work on and you can see that you can do a lot more with all those nice dies from the Sidekick Essentials line.

On the back of the book I attached flower lace.

For the Sentiment I used Sidekick Essentials 4.

I hope you are just as excited as I am about the new Sidekick Essentials dies. They are so versatile. And hopefully I’ve inspired you a little bit again. 

See you next time!

Marjolijn

Elizabeth Craft Designs Supplies:

%d bloggers like this: