It is almost Fall over here in the Netherlands so time to play with this season. This time I made a page in my TN. I used the Holiday Special Kit and some dies from Joset.
First I made the page with the house dies and the Fabrick paper. I realy love the brick at the back. The roof is made with Kraft Cardstock paper from Tim Holtz. This is beautiful paper which you can scrub.
Then it is time to decorate the house with some fall stuff. At the left page I adhere a three with leaves and pumpkin’s. All these parts are coloured with Distress Oxide Ink.
At the right page I used stamp/dies from the girl and lantern from the Holiday Special Kit. You can colour this with anything you want, I thought the watercolour pallete from ECD is perfect for this.
At least I made a big pumpkin and some smaller with some leaves. And in the right corner I adhere a sentiment. I like to adhere everything in different depths. The leaves are between the pumpkins, behind the pumpkins and in front of the pumpkins.
I think this is everything about this page. I hope you liked this post and got some ideas.
Hi crafty friends…Michelle here with you today sharing a card using the beautiful sunflower from the Sunshine Stamp Set part of the Beautiful Blooms Collection. Let’s get to it, shall we?!
Step 1: Cut a piece of watercolour paper to 3.75″x5″. Add water to your cardstock using a clean paintbrush and then do a light water colour wash using 2 of the blue colours in the 24 Colour Watercolour Palette, being sure to allow layers to dry in between adding the next colour.
Step 2: While the watercolour piece is still a bit damp, place stencil from the Earth Patterns pack over and sprinkle on pigment powder. Remove the stencil and allow to dry. Because the background was still a bit damp and the powders did spread slightly, I did lose a bit of the pattern of the powder, but I was still happy with how it looked.
Step 3: Heat emboss the sunflower in black on the same watercolour paper, to keep the look uniform. Start to add colour to the flower, again using the 24 Colour Watercolour Palette, being to sure to allow your paint to dry inbetween layers of colour. Set aside and allow to dry.
Step 4 & 5: Once the flower is completely dry, cut it out using the coordinating die and cut out 3 more without the image. These will be used to stack for dimension. On the same watercolour paper heat emboss the sentiment using the black embossing powder and cut out 2 or 3 more blank sentiments to stack together as well. Add liquid adhesive and stack them together.
Step 6: Adhere the watercolour background using craft foam to the A2 top folding cardbase. Add the flower using a liquid adhesive and the sentiment as well, adding a few small foam squares to the both ends of the sentiment. Add a twine bow to the sunflower and a few iridescent bubbles as a finishing touch.
Thank you so very much for stopping by. I hope that this card has helped to inspire you in some way. I wish you all the most wonderful and crafty day! Until next time,
Hi, It’s Marla here with my first blog post as an Elizabeth Craft Designs Ambassador. Today, I am sharing two cards showing how you can achieve different looks using the same stamps. I’ll start with the more detailed of the two cards.
Cut a panel using watercolor cardstock to 5 1/2″ x 3 1/2.” Wash the background with the watercolor of your choice. Once dry, add gold watercolor around the edges. Stamp the sentiment from the “Your Day” stamp set with clear embossing ink. Cover with white embossing powder and heat set. Add gold splatters using a watercolor brush.
2. Cut the next layer to 6″ x 4 3/16″ and run it through a crimper. Use gold watercolor to add paint across some of the raised lines to add interest.
3. Select a pattern from the “Worn Wood” paper pad and to 6 1/2″ x 4 3/4″. Distress all four sides of the paper using your scissors. Paint the edges with gold watercolor.
4. Stamp the largest floral image from the “Blossoms” stamp set onto a piece of watercolor paper using clear embossing ink. Add white embossing powder and heat set. Watercolor the flower using the colors of your choice. Use the coordinating dies to cut the image and splatter with gold watercolor. Cut the floral into three pieces adding 1/8″ foam tape to the back.
5. Adhere all three paper layers to a 5″x7″ card base.
6. Arrange the floral images around the sentiment and embellish with jewels.
My second card is very clean and simple.
1. Cut white cardstock to 8 5/8″ x 4 1/2″. Stamp the two smaller floral clusters from the “Blossom” stamps around the edges, changing the direction of your stamp and stamping off the edge.
2. Use clear embossing ink to stamp the sentiment from “Your Day” onto the center of the card panel. Add the embossing powder over the top and heat set.
3. Cut a piece of cardstock that coordinates with your floral stamping to 8 3/4″ x 4 9/16″ and adhere the stamped cardstock to the center.
4. Adhere to a card base.
Here is another look at both cards together. One with a vintage feel and the second clean and simple. Do you have a favorite?
Thank you for joining me today. I am looking forward to spending this next year with you here on the Elizabeth Craft Designs Blog. Until next time….. Marla
Hello Friends and welcome to the Elizabeth Craft Designs Blog. It is Karan here sharing a Christmas card with you, designed with the new Blooms Collection and Florals 12 from Elizabeth Crafts. Along with a easy background tutorial you can easily do on your own.
I am in the mood for Christmas and wanted to create a few more Christmas Cards so I hope you enjoy this one.
I went into my EC stash and pulled out everything related to Christmas, to create this. I have a few steps here i can share with you on how i created this gorgeous card.
To begin with i used canson water color paper for my main background, smooshed some antique linen on my mat and pulled my background paper through that. (this measures 4 x 6 by the way) Stamping with CS146 as i felt it reminded me of the days of Christmas. I used Gold embossing powder form Nuvo and heat set that.
I inked around the edges with antique linen distress ink again just to add a bit of dimension. I added some splatters to the background using aged mahogony and the water brush woth the water color set.
I then set that aside to dry and got started on my blooms.
I stamped 6 of the poinsettia flowers from the Peace Bloom set. I wasn’t sure at this point how many I was going to use, I just knew I wanted to use them. I stamped with versa mark and then heat setting them with gold embossing powder. I then colored them with the water colors. As it turned out I only used two of these on my final project. I stamped the sentiment from CS101 – Classic Christmas Sentiments onto canson water color paper using black Archival Ink. I did the same smooshing technique to the sentiment as i did to my background.
Layering the main background with black, then gold mirri, red and craft to coordinate with the colors in the background. I added some florals using the florals 12 coloring with aged mahogany and adding stamens to the centers.
I wanted to use the blooms from the Peace set as the background layer and added my florals 12 on top of that both on the top and bottom of the sentiment block
I grabbed my favorite snow paste and just dabbed some of that around my card to give it that snowy look you see.
I added some colored seam binding and gold thread to tie this all together. I hope you have enjoyed my little step out tutorial today.
Hey Crafters! Katelyn here, sharing with you my Gratitude Card.
To create my Gratitude Card, I’ve used a variety of dies from Joset Designs and stamps from the Beautiful Blooms Collection. You’ll want to read below as I share with you how to recreate my card at home.
Step One. Choose two pieces of patterned paper out of the Reminiscence the Book 2. Die cut a 4″ Stitched Rounded Rectangle out of one of the patterned papers. Die cut a 3 1/2″ Stitched Rounded Rectangle out of the other patterned paper. Distress the edges of both rectangles. Ink the edges of both rectangles using Walnut Stain Distress Ink and a blending tool with foam.
Step Two. Choose one piece of patterned paper out of the Reminiscence the Book 2. Die cut a 3 3/4″ Fitted Rounded Rectangle out of one of the patterned paper. Distress the edge of the rectangle. Ink the edges of the rectangle using Walnut Stain Distress Ink and a blending tool with foam.
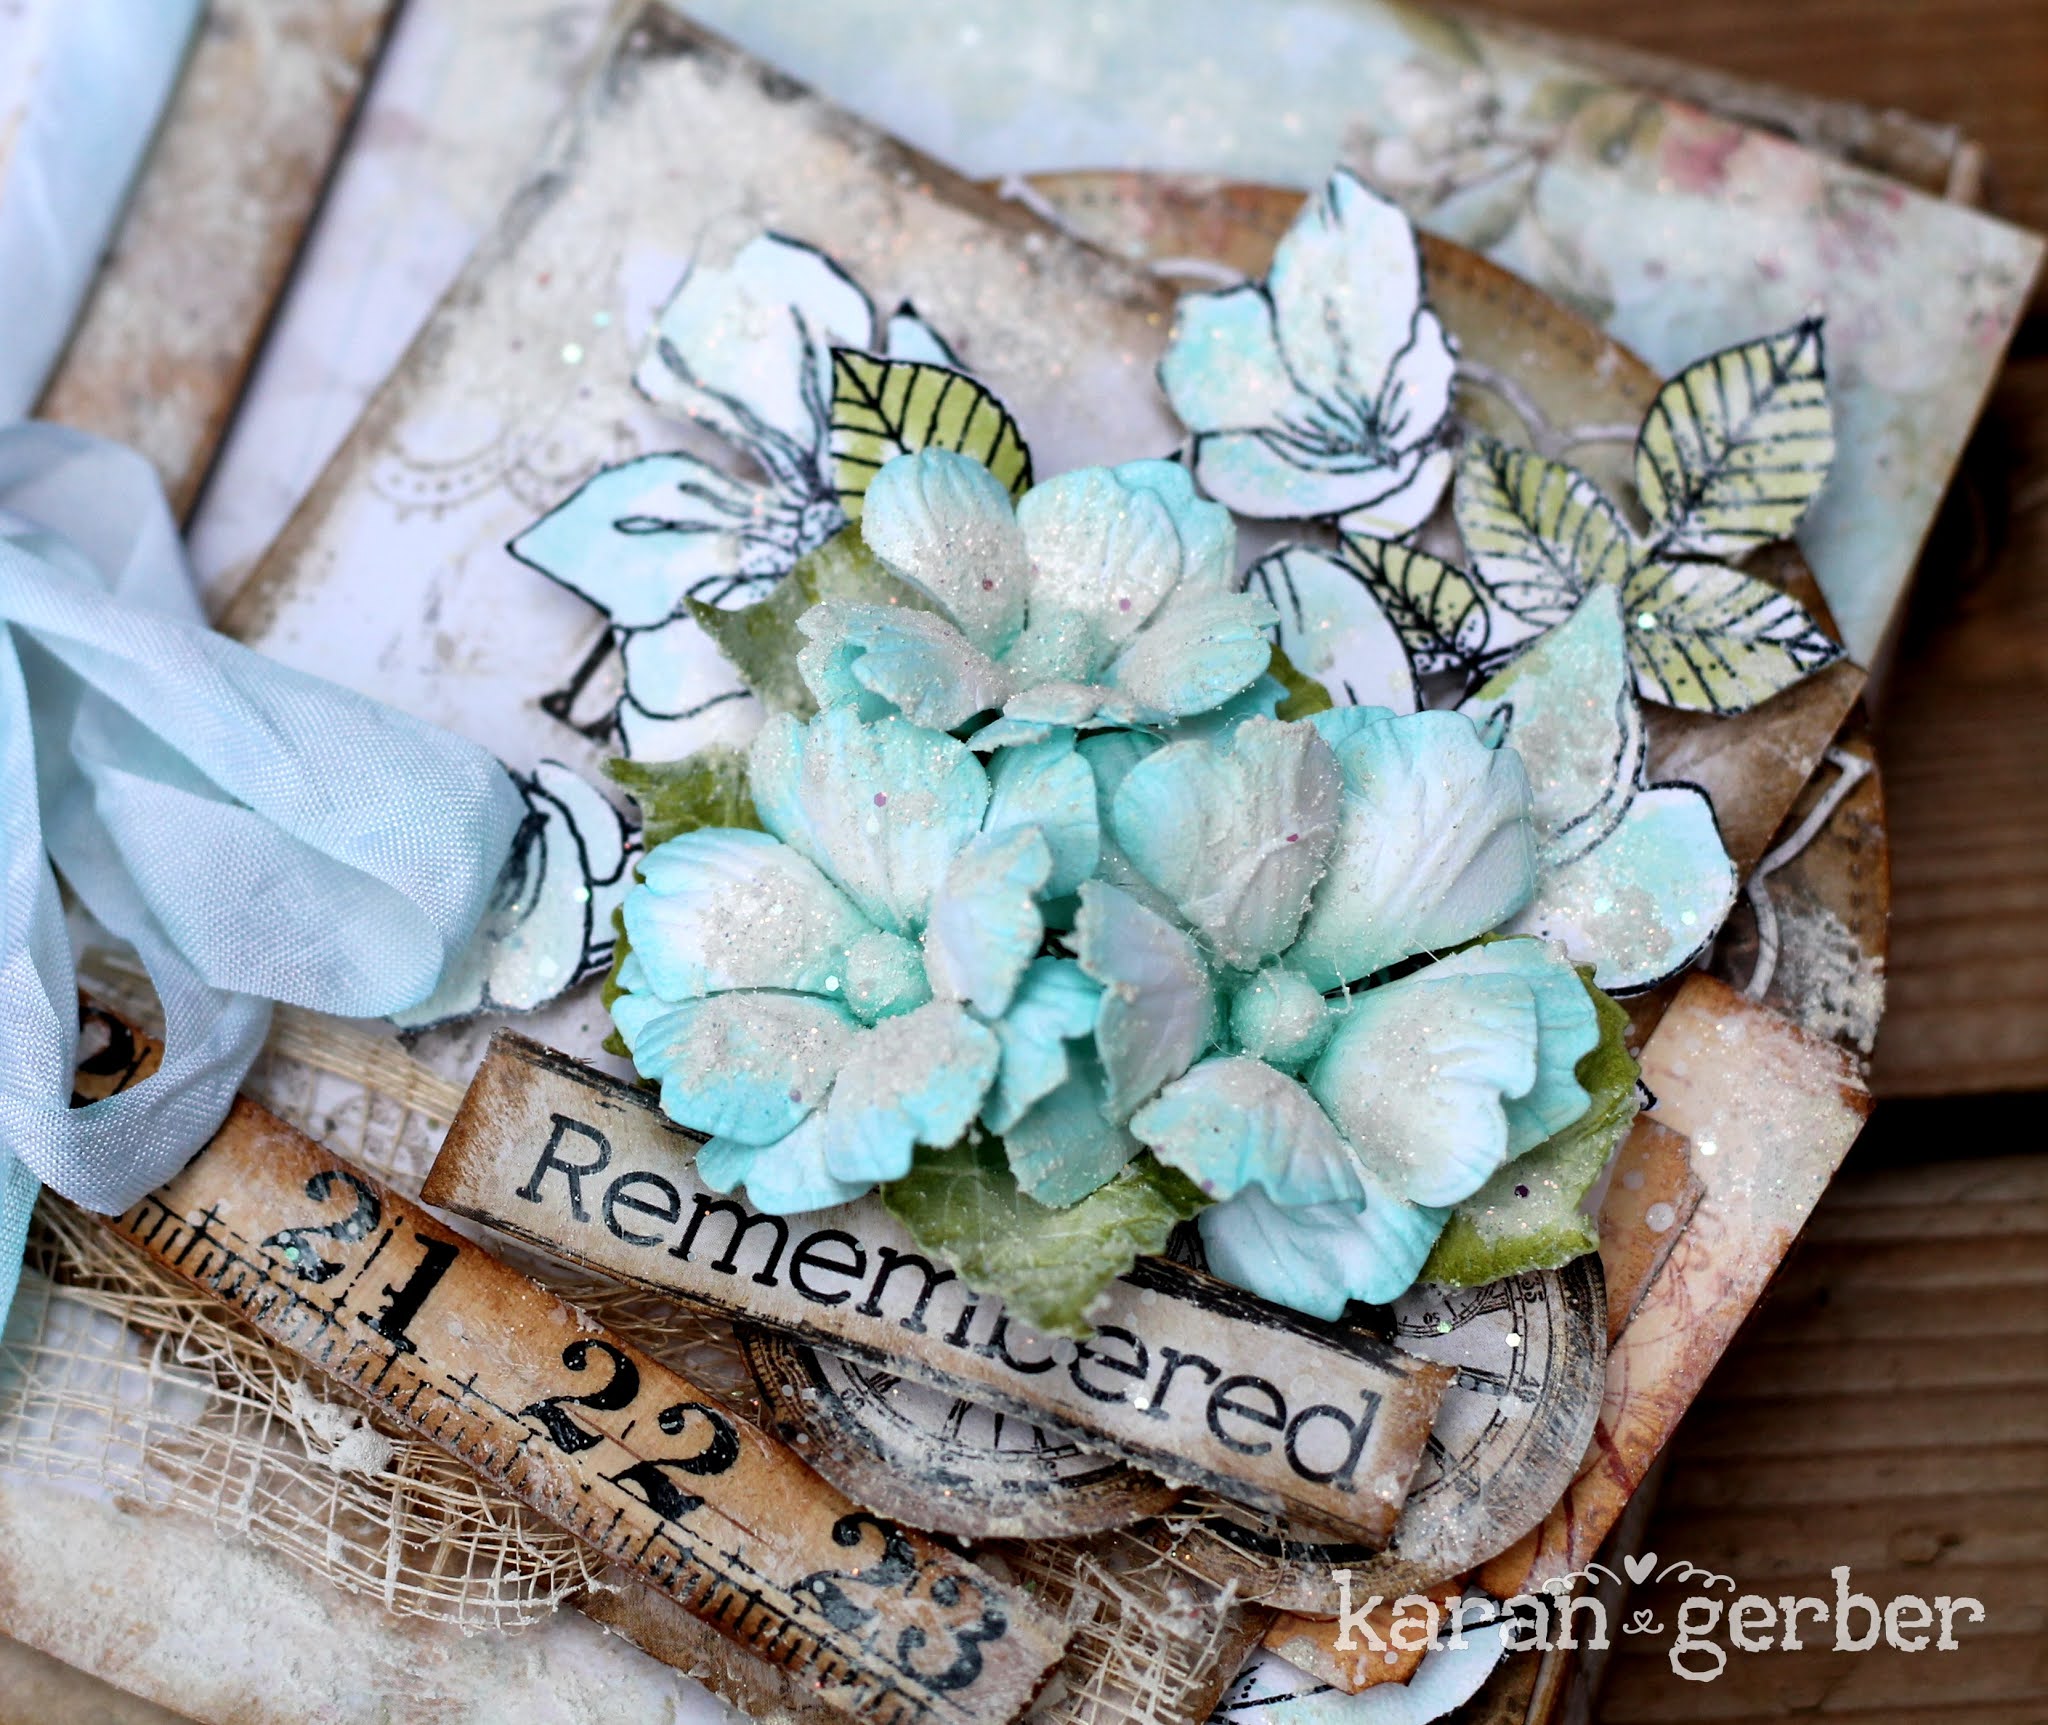
Step Three. Choose another piece of patterned paper out of the Reminiscence the Book 2. Die cut a 3/4″ Diagonal Stitched Fishtail out of the patterned paper. Cut the fishtail down to 3″. Apply Ground Espresso Distress Ink to the Gratitude word from the Beautiful Blooms – Gratitude stamp set. Stamp onto the fishtail. Distress the edges of the fishtail. Ink the edges of the fishtail using Walnut Stain Distress Ink and a blending tool with foam.
Step Four. From the Gratitude Stamp Set, you’ll need the rose bunch and the single rose. Apply Jet Black Archival Ink to the rose bunch and stamp onto a piece of watercolour cardstock. Apply Jet Black Archival Ink to the single rose and stamp onto the same piece of cardstock. Reapply ink to the single rose and stamp again on the same piece of watercolour cardstock. Colour the rose bunch and the two single roses in using a waterbrush and the Watercolour Palette. Once the flowers have dried, fussy cut the flowers out. Ink the edges of the flowers using Walnut Stain Distress Ink and a blending tool with foam.
Step Five. Adhere the 3 3/4″ rectangle to the 4″ rectangle. Foam square the 3 1/2″ rectangle to the 3 3/4″ rectangle.
Step Six. Adhere the fishtail 1 7/8″ from the bottom and 1 1/4″ from the left of the 3 1/2″ rectangle. Adhere the single roses around the fishtail as desired.
Step Seven. Foam square the rose bunch so that it sits slightly on the adhered single roses.
Step Eight. To finish the card, cut a cardbase out of White Soft Finish Cardstock that measures 4″ x 10 1/2″, score at 5 1/4″. Adhere the cardfront to the cardbase.
Thanks for joining me today! I hope that I’ve inspired you to create your own version of my Gratitude Card at home.
Hello again, Annette Green back again this month with a simple and elegant anniversary card I created for my parents who celebrated their 60th recently. Here’s how I made it…First, I stamped some images from the Gratitude stamp set onto watercolor cardstock with archival black ink. Then I used my ECD watercolors to color them. The design of the images has stippled dots which are perfect little hints where the deepest shadows are, so I painted those areas a little darker.Next, I used the compatible dies (coming soon!) to cut them out. This is such a great time saver!After cutting a pretty paper for the front of my card, I selected a stencil that had a small, pretty repeating pattern. (Stencil to come soon too!)Next, I spread some clear texture paste through the stencil onto my pattern paper. I gently lifted the stencil away and set it aside to dry completely.You can see how this adds lovely texture and dimension to the paper once dry.Onto some ivory cardstock, I stamped Celebrate and drew in the black drop shadow with a marker, then added some ink around the edges and some tiny dots in a compatible green color.My ivory card base is 5″ x 7″. I layered some black paper first, then the pattern paper, and added a die-cut doily.Next, I started layering elements flat onto the card.To finish off the front, I added the final die-cut flower piece with dimensional foam tape to pop it up.A little bit of stamping on the inside and the card is done! Super simple, but very elegant. Thanks for visiting today. Have a great day!
Hello, it’s Annette Green today with some bright and cheery Summery plages in my Nature Planner. You may recall my Facebook Live I did for Elizabeth Craft Designs back in July where I showed how to create watercolored backgrounds using dies as stencils. If you missed it, you can view it here on the ECD YouTube channel. Today’s post includes a new video where I add photos to those pages and share some ideas and techniques.My Nature Planner is a Sidekick size, so I’ve used mostly Sidekick dies as I mention in the video. The complete list is below with links to all products I’ve used. Using the watercolors (yes, they’re back in stock!) allow you to customize your die-cut pieces and backgrounds perfectly to coordinate with your photos. I’ve used the Soft Finish White Cardstock for all of mine, which watercolors work very nicely on.The Florals 13 die-set was perfect for these tropical, summery flowers on my pages as well. I love mixing and matching all the ECD dies into my projects.I hope you take a moment to watch the video and follow along as I make up these pages. Thanks for stopping by today!
Hello Friends and Welcome to the EC Designs Blog. It is Karan here to share a project with you.
I know it has been awhile since i have posted crafty projects with our big move almost behind us, i am slowly getting back to creating. My first project is using their floral stamps and beautiful floral dies creating a gorgeous mini album.
My first project back is Designed using Florals 13. Which i have shaped into Wild Roses. I matched the color of them with the paper i used in my project. Using a foam bud as my center.
Stamping the Blossom set out on Soft Petal Cardstock from Elizabeth Crafts with black archival ink, i decided to use my water brush and dab color from the same pad i used to create my florals. Salvaged Patina Distress Ink.
This project is designed as a mini folio on 49 and Market Accordion Flip Fold which comes with their new album as an insert. I thought it would make a perfect mini.
The inside i still want to decorate but my new scrap space is very much in boxes, but i promise i will add more photos when i get to my Planner dies.
I hope you have enjoyed my share with you today and I have inspired you to create your own beautiful mini albums.
Hello everyone, it´s Sanna Lippert here again with another guest design team card project share. Today I´m stopping by to share a set of mixed media cards with plenty of white space on them – and colour. I love adding stenciling, droplets and a fun mixed media twist to cards and I´d tought I´d share one of those ideas today with you. Hope you like it!
And here is how created the cards:
Step 1: Take a small gelli plate and apply three colours of alcohol ink onto it. Then take a plain brayer and roll the colour onto the gelli plate to create a faded three-tone-look. After that take a mark making tool of some kind – I used a dotted and a striped brayer – and press it/roll it over the inked layer to create a pattern. Let dry a bit.
Step 2: Next apply a thin layer of white paint over the inked pattern and then place the pattern color down onto the paper and press down to paper with your hands. Then remove the gelli plate and you have a nice pattern to use for your cards. Repeat several times with various colours and mark making tools (you can use stamps, combs, printing tools or even items from your kitchen). Whatever you find suits your project. Next die cut the created patterns into circles using the Fitted Circles die cut die and your die cutting machine.
Step 3: Next grab the Make Your Mark stencil and create patterns to white card backgrounds using the stencil with Distress Oxide tones and an ink blending tool/brush. On some I used just one colour and pattern and on other backgrounds I added two ink tones and the same pattern vertically and horizontally. You can do whatever you find attractive for your project.
Step 4: Now apply a Clear Double Sided Adhesive Sheet onto a piece of Soft Finish Cardstock and die cut the leaves for each card using the Sidekick Essentials 7 die set. After that stamp sentiments using embossing ink and the Build Your Own Sentiments 1 stamp set onto black cardstock. Then add white embossing powder onto the stamped areas, dabb the residue off and heat set with a heat tool. Now adhere the leaves onto the card base. I arranged them around the circle piece to create a cluster, because I like it that way. It leaves plenty of white space to the card still.
Then adhere the circle using 3D foam adhesive pads. This creates a bit more texture and interest to the card. After that grab some water colours (I used black on my cards) and add droplets with the water colour to the cards. Let the droplets dry properly and then finish the card off by adding the embossed sentiment on top of the circle piece and if you want, add a few buttons for additional decor. I adhered the buttons with Clear Double Sided Adhesive Tape to the card. For additional decor you can also add some Craft Drops to the cards in various colours in the very end. Make sure you let the drops dry properly, before mailing your cards, otherwise they might smear.
Here are the finished cards:
When creating cards like this, I like to use the same basic idea, but do slight variations. That way every card is still unique, but since I already have all the tools out, I get more cards done at once. You never know when you need one!
I hope you enjoyed this idea and give it a try yourself. You can also replace the alcohol inks with paint, if you don´t happen to own any. Also if you don´t own a gelli plate (or you are not that much of a mixed media person), replace this step by just die cutting a fun patterned paper for the circle piece.
See you again next month with another card tutorial. Wishing you all a fabulous August!! xxx, Sanna
Supplies:
Elizabeth Craft Designs:
Other: Sizzix Big Shot A4 Distess Oxide Inks by Ranger Inc. Ink Blending tool by Ranger Inc. Nuvo Embossing Ink by Tonic Studios Paint Brush Gelli Plate by Gelli Arts Brayers (plain and patterned) Alcohol Inks by Ranger Inc. White acrylic paint Heat tool by Ranger Inc. White Embossing powder by Ranger Inc. 3D foam pads Scissors and buttons Acrylic block for stamping


