Hello everyone, Els Schutte here with my first blog post on the Elizabeth Craft Designs Blog. I’m very excited to show you the card I made for today’s post. It’s a card that would be perfect for someone who just moved into their new home of with a slight modification just a card for any occasion. Let’s get started!
Welcome to your new home card
Cut Lacy Leaves, Florals 4, Ferns, and the Berry Branch out of the Soft Finish Cardstock, then colour them in soft pink and green Inks. Shape the flowers and leaves and glue the flowers together. Put some stamens in the centre and put laquer on the big knobs and pearl drops on the small Berry branch.
Cut a piece of Soft Finish Cardstock 8 1/2 x 8 1/2 and fold in half, this is your base card. Cut another piece of the same cardstock of 8 1/4 x 4 and put this piece on 3D foam blocks and place on top of your card. Cut the door with the die from the phone Booth set, use the parts from the window as bricks. Start with placing the leaves.
Place the flowersPlace some big knopsAd some leaves
Cut the berry Branch apart and use them on different spots in the cluster. Use some green Ink to make a shadow on the bricks. Ad a string of pearls and bow and your card is done.
I Hope you will give this card a try, it’s a nice gift if you get new neighbours or someone gets a new Home.
Elisabeth Craft Design supplies used:
Other materials: Ribbon – Pearlstring, Green-Pink Ink – pearl drops and Laquer
Hello Friends and welcome back! its Karan here for my first post for 2022. Im excited to be back as Brand Ambassador and I am sharing another card today
I designed this using florals 1 for the flowers
,
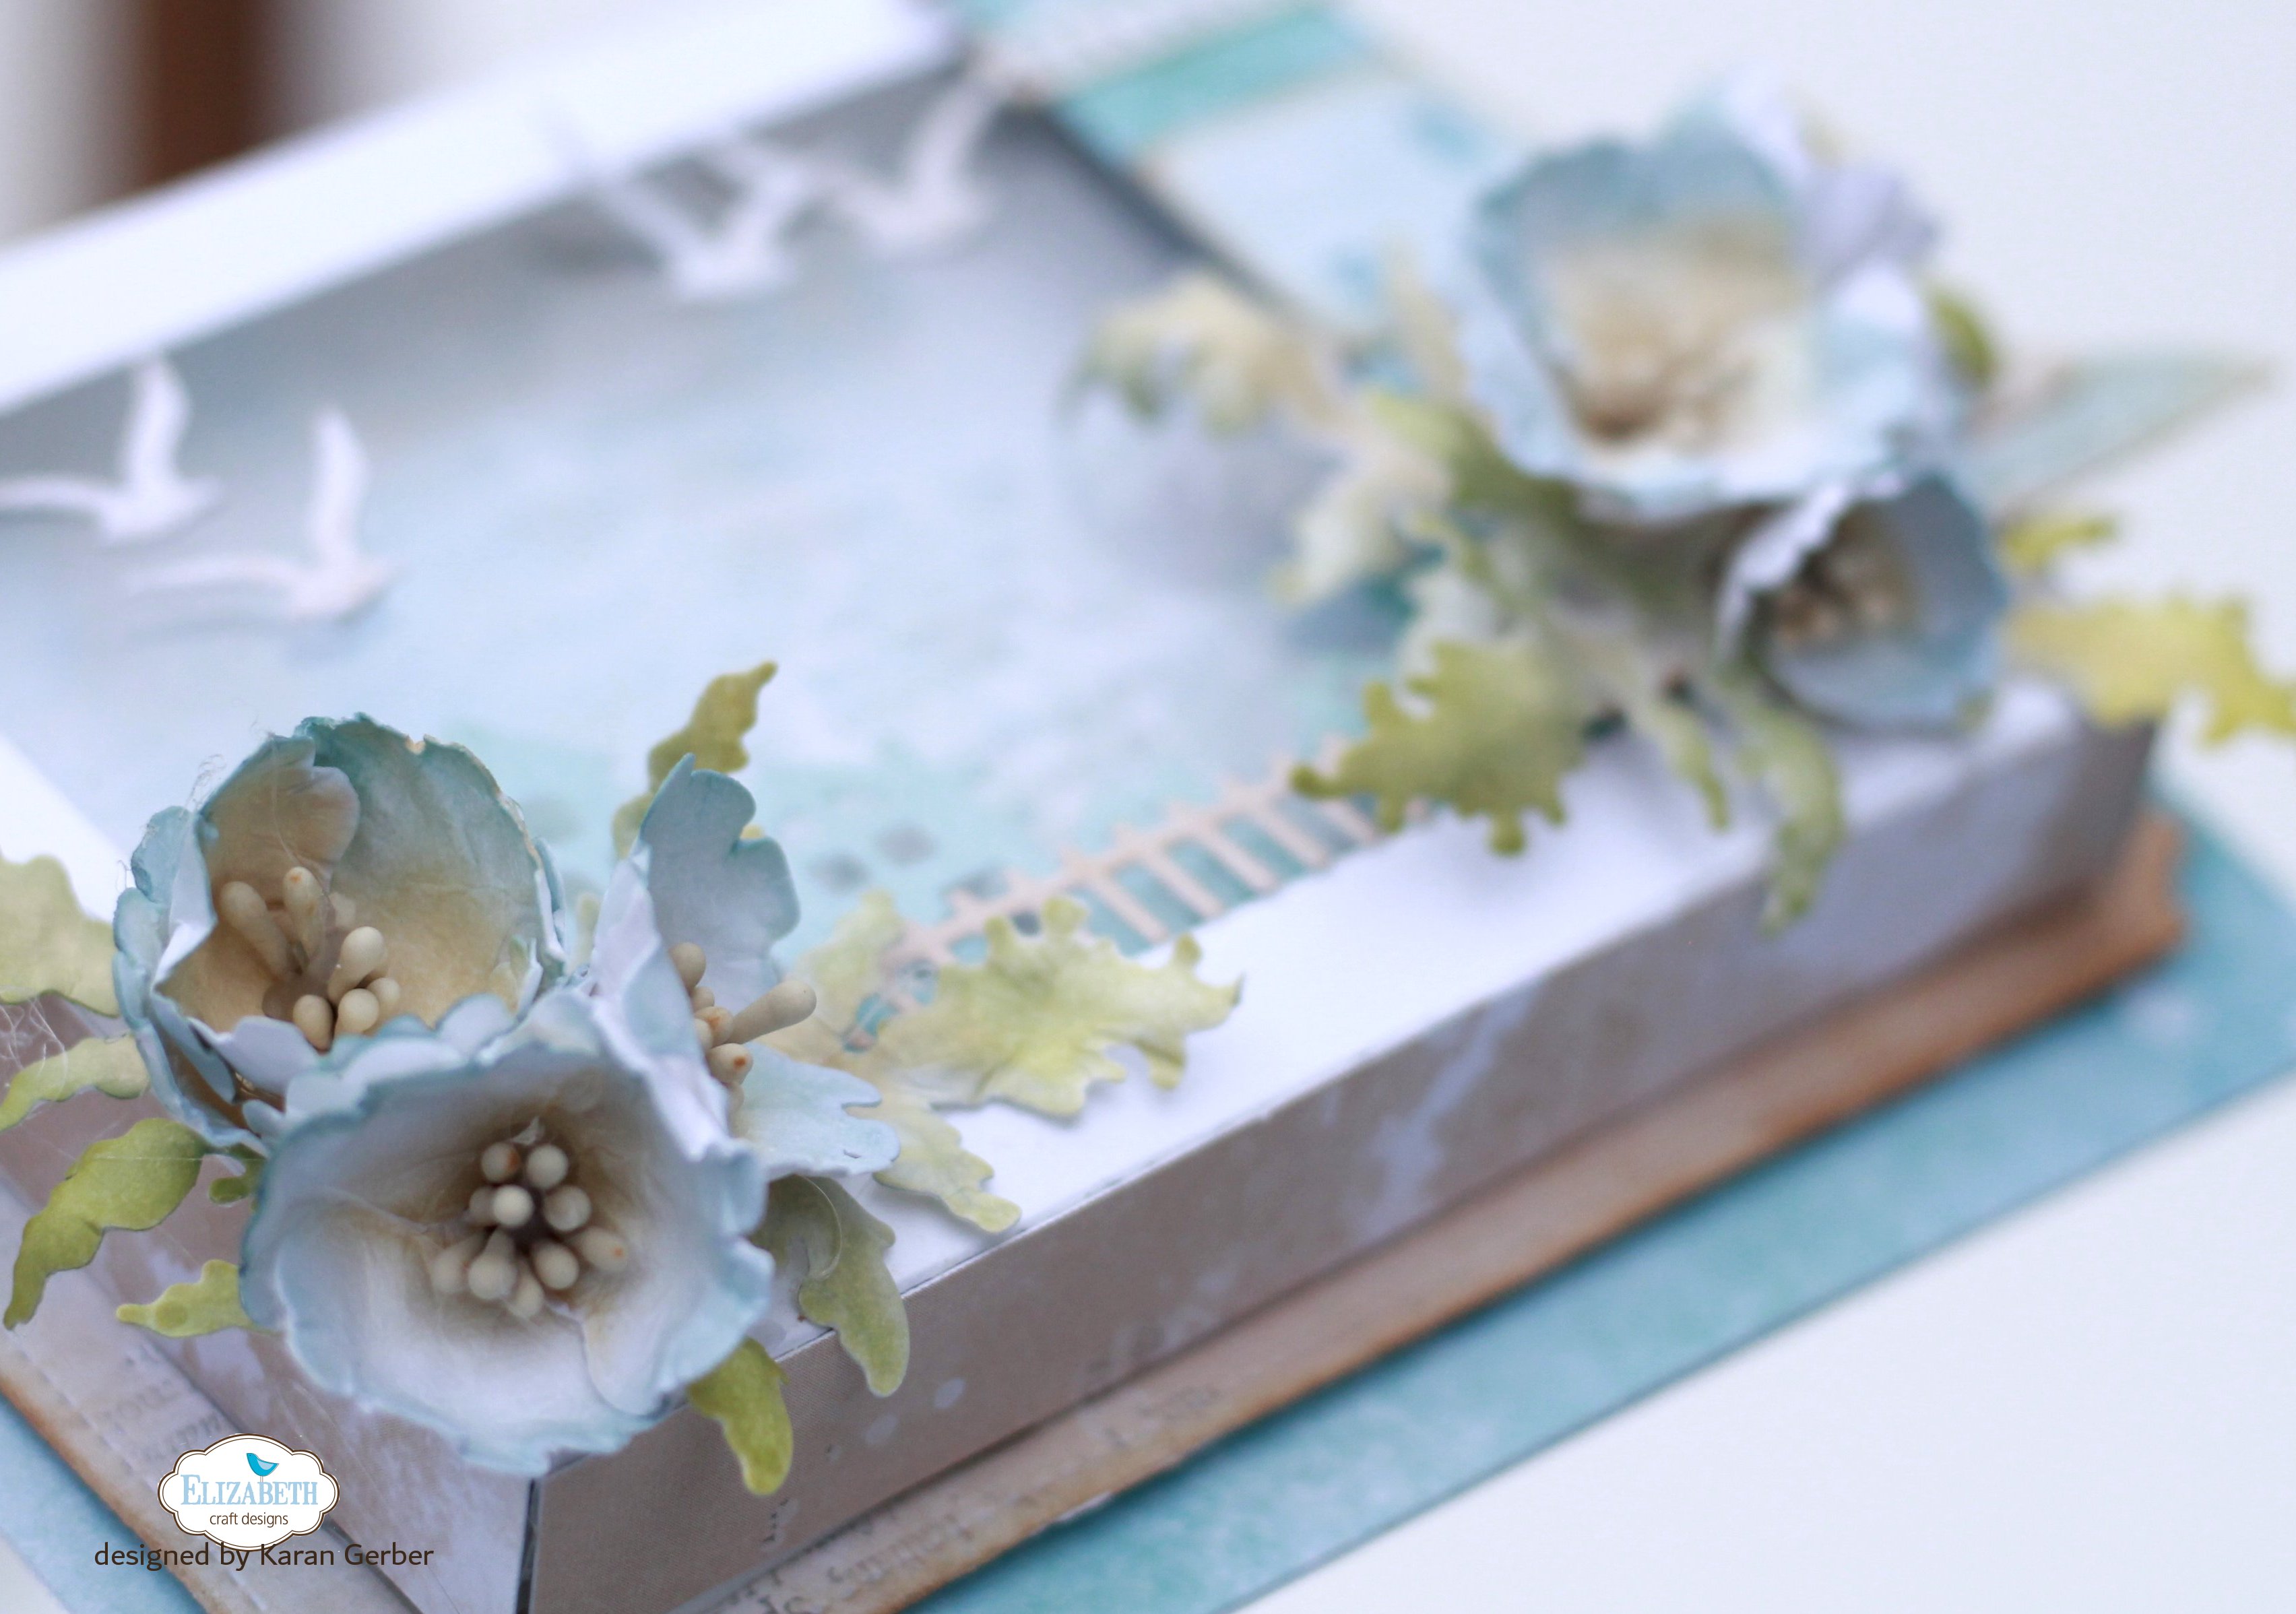
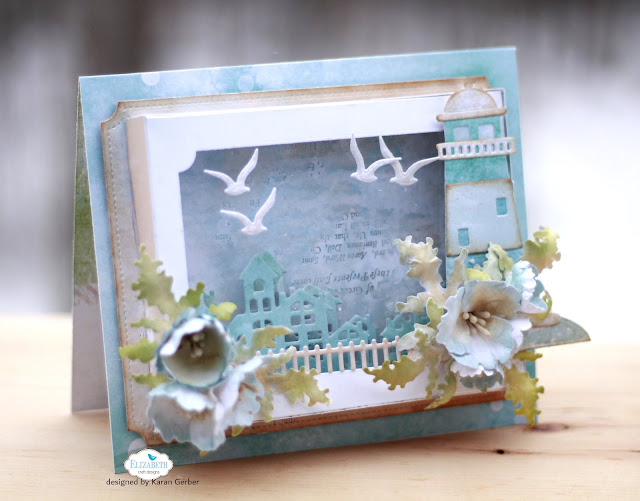
I die cut the Village Edges twice. Using one on the inside of the box, attached to the card base, and one to the frame of the box,
The front of the shadow box has acetate on it, so i thought the birds would look like they were really flying.
Being on the lake here in Northern Ontario, i love that Lighthouse and felt it would be perfect to create a scene on my card. This is designed on the Beached paper from 49 and Market.
This is a perfect card for loved ones who might have purchased a cottage or like we have done, retired to the lake.
I hope you enjoy my first project for 2022 and I look forward to inspiring you this year.
Hi Friends and welcome to my last blog post for the year for Elizabeth Craft Designs. It was a little over a year ago when I first began my journey with Elizabeth Crafts. Creating with their florals and A5 Planner dies this past year has been so much fun. I just couldn’t close out my year without sharing one final Christmas Card.
At this point, I am not sure what 2022 will bring with Elizabeth Craft Designs, but I hope you love my final project.
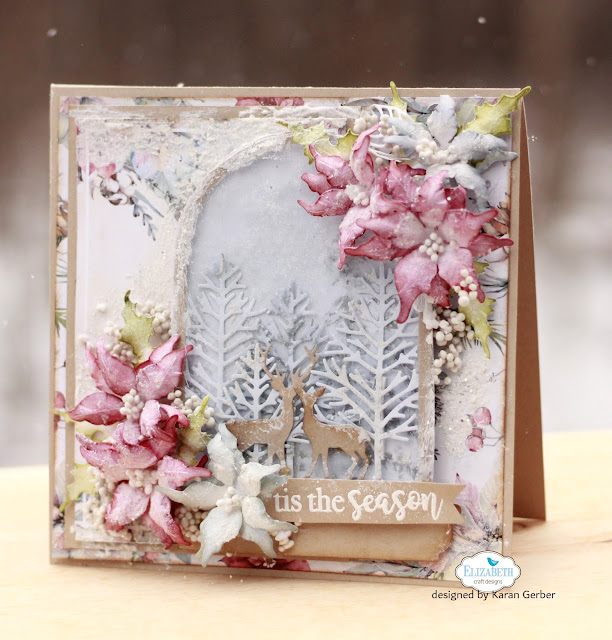
The florals were designed using Florals 12. I know I have shared a lot of projects with these florals but Christmas to me isn’t just a day, it isn’t just a month, it’s a season. And this Season my family and I have much to be thankful for! So with Christmas season upon us, I set out to create one last Christmas Card for 2021.
Here on St Joseph Island, we see deer all the time. They are almost sighted each day we head out for errands. I couldn’t resist creating a shaker card with Joset’s Snow Globe and those deer and trees from the Winter Scenery Set.
To begin with, I cut out the globe on pattern paper and on craft cardstock and than traced it out on acetate so I have a full size piece for the front of the globe. I fussy cut out foam tape and taped the back trim of the die to create a shaker card. I placed glitter on the inside of the shaker.
I cut four of the trees from the Winter Scenery Die Set and cut thin strips of foam tape to adhere to the back of the trees to add some dimension to the globe. I adhered the deer from the Snow Globe Sidekick Set to the front. I just love how this looks, it creates an awesome winter scene in that globe doesn’t it?
Die cutting out 6 large and 6 medium florals along with 6 leaves I colored and shaped them (if you are a member of the Elizabeth Crafts family Group on Facebook, I did a Live on Friday, Dec 17th and you can see just how I shaped and created those gorgeous florals here: Live Facebook with Karan. If you are not a member, be sure to become one so you can view the replay)
So getting back to my card, I stamped and heat embossed my sentiment from the Classic Christmas Sentiments set using White Embossing Powder and attached that to the bottom of the card.
My final step was to add snow paste and I thought some Art Stones would be a nice touch and look like snow balls around the florals.
Thank you for following me along this year with my craft shares for Elizabeth Craft Designs. Have yourself a Merry Christmas and I am praying that 2022 will see us all back to normal. Blessings for a bright, prosperous and Healthy 2022!
Yes it was snowing when I took this photo, so fitting for the style of my card Happy Scrapping and I hope to be sharing more with you in 2022!
Hello Friends and welcome the Elizabeth Crafts Blog. Today I have a floral card to share with you, designed using some of my favorite floral dies
I started by die cutting leaves, and florals coloring them using Smoky Gray Versa Ink and Victorian Velvet Distress ink. The Lacy Leaf was cut from gray cards tock as was the fern from the Berries and Branches.
i added a touch of Victorian Velvet ink to the center of the leaves just for a bit of detail
I added some prills from my stash and dabbed a bit of snow paste on top, tucking in the lacy leaf and the fern to add more layers a few detail shots above and below.
I would love to see some of your beautiful cards designed using Florals 7, I hope you have enjoyed my card today.
Hey Crafters! Katelyn here, sharing with you my Merry Christmas Card.
To create my Merry Christmas Card, I’ve used a variety of dies from the Paper Flowers Collection as well as Joset Designs and stamps from the Planner Essentials Collection. You’ll want to read below as I share with you how to recreate my card at home.
Step One. Choose two pieces of Christmas patterned paper. Die cut a 4″ Stitched Rounded Rectangle out of one of the patterned papers. Die cut a 3 3/4″ Fitted Rounded Rectangle out of the other patterned paper. Distress the edges of each rectangle.
Step Two. Die cut a 3 1/2″ Stitched Rounded Rectangle out of a piece of White Soft Finish Cardstock. Distress the edges of the rectangle.
Step Three. From a third piece of Christmas patterned paper, die cut a 2 1/4″ Stitched Circle from the Pizza Box Die. Distress the edges of the circle.
Step Four. From the Winter Words Stamp Set, you’ll need the Merry and Christmas words. Apply Potting Soil Archival Ink to the words and stamp onto a piece of White Soft Finish Cardstock. Cut the two words into two strips.
Step Five. From the Winter Greens die, die cut the holly twice out of a piece of White Soft Finish Cardstock. Using a blending tool with foam, blend Forest Moss Distress Ink over the entire surface of each holly piece. Shape the leaves as desired.
Step Six. From the Winter Greens die, die cut the berry branch twice out of a piece of White Soft Finish Cardstock. Using a blending tool with foam, blend Candied Apple Distress Ink over the entire surface of each berry branch.
Step Seven. From the Florals 11 die, you’ll need the large, medium, small and ruffled centres. Die cut the large flower once, the medium flower three times, the small flower three times and the centres twice out of a piece of White Soft Finish Cardstock. Using a blending tool with foam, blend Festive Berries Distress Ink over the entire surface of each flower. From the centres, you’ll need two small and one medium centre. Adhere the flowers together. Two of the flowers will have a medium and small flower as well as a small centre adhered together. The remaining flowers and centre will be adhered together. Shape the flowers as desired.
Step Eight. Adhere the 3 3/4″ rectangle to the 4″ rectangle. Adhere the 3 1/2″ rectangle to the 3 3/4″ rectangle.
Step Nine. Foam square the circle 3/8″ from the left and 1 1/4″ from the top of the 3 1/2″ rectangle.
Step Ten. Adhere the holly branch and berry branch to the bottom right side of the circle. Adhere the other holly branch and berry branch to the left of the perviously adhered holly branch and berry branch as desired.
Step Eleven. Use foam squares to adhere the large flower to the bottom middle of the circle. Foam square the remaining flowers to the right and left of the large flower.
Step Twelve. Adhere the Merry Christmas words to the circle as desired.
Step Thirteen. Cut a cardbase out of White Soft Finish Cardstock that measures 4″ x 10 1/2″, score at 5 1/4″. Adhere the cardfront to the cardbase.
Thanks for joining me today! I hope that I’ve inspired you to create your own version of my Merry Christmas Card at home.
Katelyn
Elizabeth Craft Designs Supplies Used:
Other Supplies Used:
Distress Ink: Candied Apple, Festive Berries and Forest Moss
Hello Friends and welcome to the Elizabeth Craft Designs Blog. It is Karan here sharing a Christmas card with you, designed with the new Blooms Collection and Florals 12 from Elizabeth Crafts. Along with a easy background tutorial you can easily do on your own.
I am in the mood for Christmas and wanted to create a few more Christmas Cards so I hope you enjoy this one.
I went into my EC stash and pulled out everything related to Christmas, to create this. I have a few steps here i can share with you on how i created this gorgeous card.
To begin with i used canson water color paper for my main background, smooshed some antique linen on my mat and pulled my background paper through that. (this measures 4 x 6 by the way) Stamping with CS146 as i felt it reminded me of the days of Christmas. I used Gold embossing powder form Nuvo and heat set that.
I inked around the edges with antique linen distress ink again just to add a bit of dimension. I added some splatters to the background using aged mahogony and the water brush woth the water color set.
I then set that aside to dry and got started on my blooms.
I stamped 6 of the poinsettia flowers from the Peace Bloom set. I wasn’t sure at this point how many I was going to use, I just knew I wanted to use them. I stamped with versa mark and then heat setting them with gold embossing powder. I then colored them with the water colors. As it turned out I only used two of these on my final project. I stamped the sentiment from CS101 – Classic Christmas Sentiments onto canson water color paper using black Archival Ink. I did the same smooshing technique to the sentiment as i did to my background.
Layering the main background with black, then gold mirri, red and craft to coordinate with the colors in the background. I added some florals using the florals 12 coloring with aged mahogany and adding stamens to the centers.
I wanted to use the blooms from the Peace set as the background layer and added my florals 12 on top of that both on the top and bottom of the sentiment block
I grabbed my favorite snow paste and just dabbed some of that around my card to give it that snowy look you see.
I added some colored seam binding and gold thread to tie this all together. I hope you have enjoyed my little step out tutorial today.
Hey Crafters! Katelyn here, sharing with you my Have a Wonderful Holiday Season Card.
To create my Have a Wonderful Holiday Season Card, I’ve used a variety of dies from the Paper Flowers Collection as well as dies and stamps from Joset Designs. You’ll want to read below as I share with you how to recreate my card at home.
Step One. Die cut a 3 1/2″ Stitched Indented Rectangle out of a piece of White Soft Finish Cardstock. Sprinkle Red and Olive Magenta Nuance on the rectangle as desired. Spritz the powder and allow to dry. Once it’s dry, distress the edges of the rectangle. Ink the edges of the rectangle using Black Soot Distress Ink and a blending tool with foam.
Step Two. Choose two pieces of coordinating Christmas paper. Die cut a 3 3/4″ Fitted Indented Rectangle out of one of the papers. Die cut a 4″ Stitched Indented Rectangle out of the other patterned paper. Distress the edges of both rectangles. Ink the edges of both rectangles using Black Soot Distress Ink and a blending tool with foam.
Step Three. Die cut the Elegant Ornament out of a piece of copper foil paper. Cut the ornament down to 4 1/2″.
Step Four. From the Leaves & Branches die, you’ll need the berry branch. Die cut the berry branch three times out of a piece of White Soft Finish Cardstock.
Step Five. From the Florals 12 die, you’ll need the two sizes of leaves. Die cut the small leaf three times out of a piece of White Soft Finish Cardstock. Die cut the large leaf four times out of a piece of White Soft Finish Cardstock. Using a blending tool with foam, blend Forest Moss Distress Ink over the entire surface of each leaf. Shape the leaves as desired.
Step Six. From the Florals 12 die, you’ll need the small, medium and large poinsettias. Die cut the small poinsettia three times out of a piece of White Soft Finish Cardstock. Die cut the medium poinsettia three times out of a piece of White Soft Finish Cardstock. Die cut the large poinsettia once out of a piece of White Soft Finish Cardstock. Die cut the centres three times out of White Soft Finish Cardstock. Using a blending tool with foam, blend Festive Berries Distress Ink over the entire surface of each poinsettia petals and centres.
Step Seven. Adhere the 3 1/2″ rectangle to the 3 3/4″ rectangle. Adhere the 3 3/4″ rectangle to the 4″ rectangle.
Step Eight. Adhere the elegant ornament 3/4″ from the left of the 3 1/2″ rectangle.
Step Nine. For two of the poinsettias, adhere a small and medium poinsettia petal together as well as centre. Adhere the remaining poinsettias and centre together. Shape the flowers as desired.
Step Ten. Foam square the large poinsettia to the middle left side of the ornament. Adhere the remaining two poinsettias one above and one below the large poinsettia as desired.
Step Eleven. Adhere the leaves and branches as desired in amongst the poinsettias.
Step Twelve. Apply Jet Black Archival Ink to the Have a Wonderful Holiday Season sentiment from the Joyful Wishes Stamp Set. Stamp the sentiment in the inside of the ornament as desired.
Step Thirteen. Cut a cardbase out of White Soft Finish Cardstock that measures 4″ x 10 1/2″, score at 5 1/4″. Adhere the cardfront to the cardbase.
Thanks for joining me today! I hope that I’ve inspired you to create your own version of my Have a Wonderful Holiday Season Card at home.
Katelyn
Elizabeth Craft Designs Supplies Used:
Other Supplies Used:
Distress Ink: Black Soot, Festive Berries and Forest Moss
Hello Friends and welcome to the Elizabeth Craft Designs Blog. It is Karan Gerber here sharing a project with you. Today I have a mini album to share with you. I designed this using the Florals 12 on the cover along with the Indented Stitched Rectangles and Stitched Fishtails. The inside boosts a few more of my favorites and I hope you enjoy.
The papers are from Stamperia – Classic Christmas. I love the vintage feel to the images in this collection and they were perfect for photo flips throughout the album.
Inside cover and first page. I free hand drew the curves pockets on the inside front cover and used the Indented Rectangles as photo mats throughout the album.
Page 2 and 3 – Indented Rectangles used again for photo flips.
Above I used Planner Essentials 16 and created a pocket from that large tree. Photo mats will fit in there. Same with the Small Villages on page 5. Photo mats will slip in under the houses and trees on that page.
For pages 6 and 7 I used the Stitched Indented Rectangles for the front of a side pocket.
For he last page and inside back cover I used the Stitched Circles and Indented Rectangles. Lots of gold mirri paper was used throughout.
I am attaching some detail photos of the cover for you. I hope you have enjoyed my project share for you today.
Hello friends and welcome back! It’s Karan and I am here today to share with you a project designed using florals 5, on the cover on this Fall Photo Folio.
I love how this fall project turned out. Here in Ontario, Canada the fall colors have been very vibrant and I wanted to capture the colors in this folio.
The inside of Folio, is a tri fold. I created a photo flip in the center using the Indented Stitched Rectangles, I used Hay Ride( 1909) on the right page inside as and love those pumpkins.
This is what the folio looks like when you open the cover. The paper is from Simple Stories and I didn’t want to cover up those gorgeous pumpkins just yet, so I might just leave this page empty.
The Stitched Indented rectangles are perfect for this photo flip, i cut four of them and scored the top over 1/2″ to score and fold over to create the flip.
its a gorgeous little mini and I love how it turned out.
The detail on those pumpkins is fabulous and this little Hay Ride was a great addition to this project.
The flowers turned out beautiful. Die cut on Soft Finish Cardstock, colored with distress inks and seed beads in the center.
Thank you for dropping by today, I hope i have inspired you to create a folio on your own.